The Rule Of Thirds

All beginner photographers should know this basic composition rule for photos. I’d like to say that the rule of thirds is only one of many composition techniques, so breaking this rule is not the end of the world.

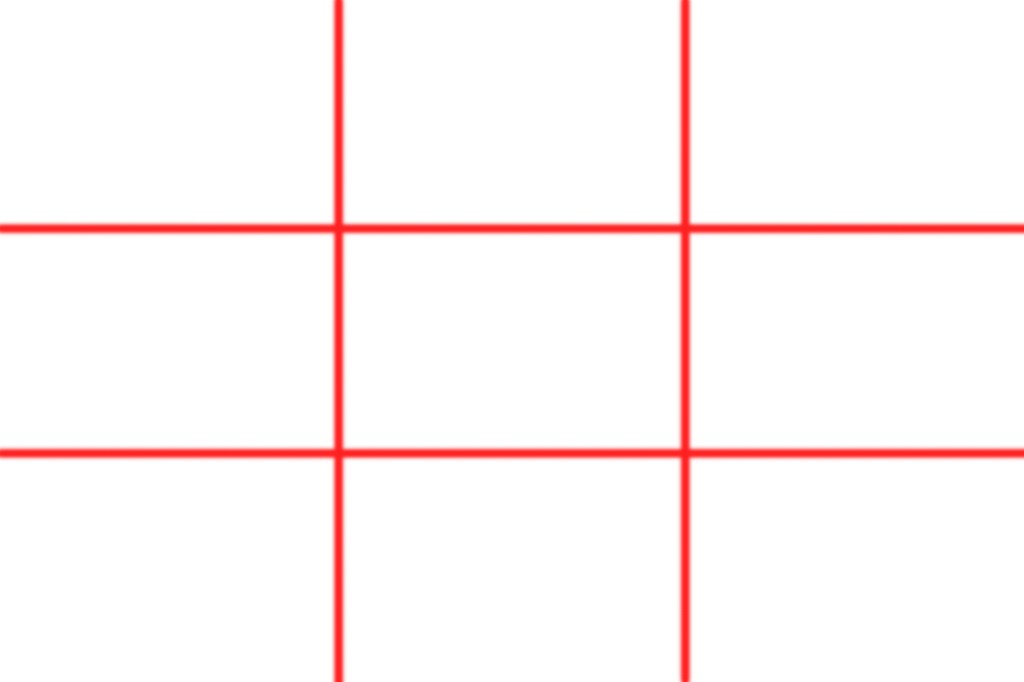
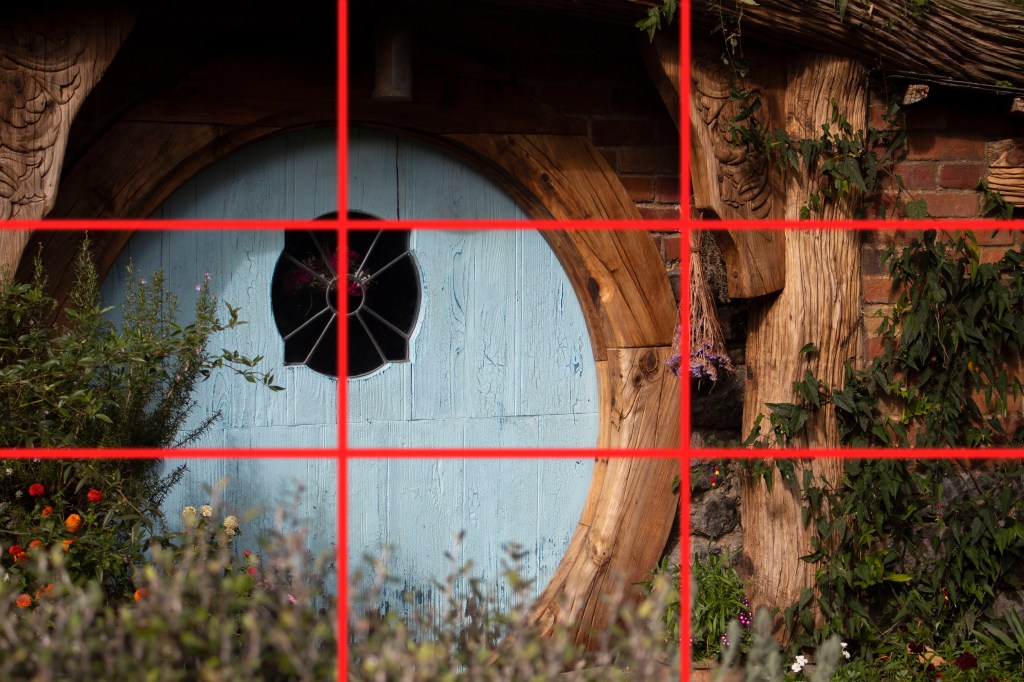
Imagine breaking your photo into thirds (both horizontally and vertically) so your image can be separated into 9 parts like a puzzle.

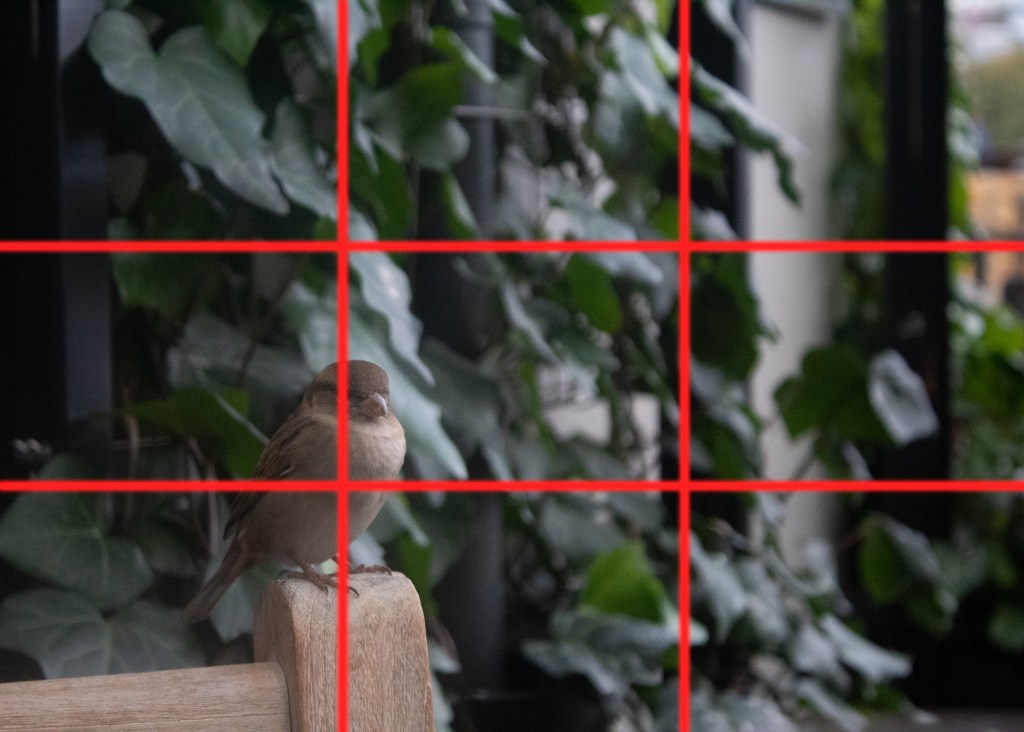
With these four lines, your image has four points of important positions in your photo. Studies have shown that people’s eyes find it more natural and balanced when points of interest are placed at these intersections.

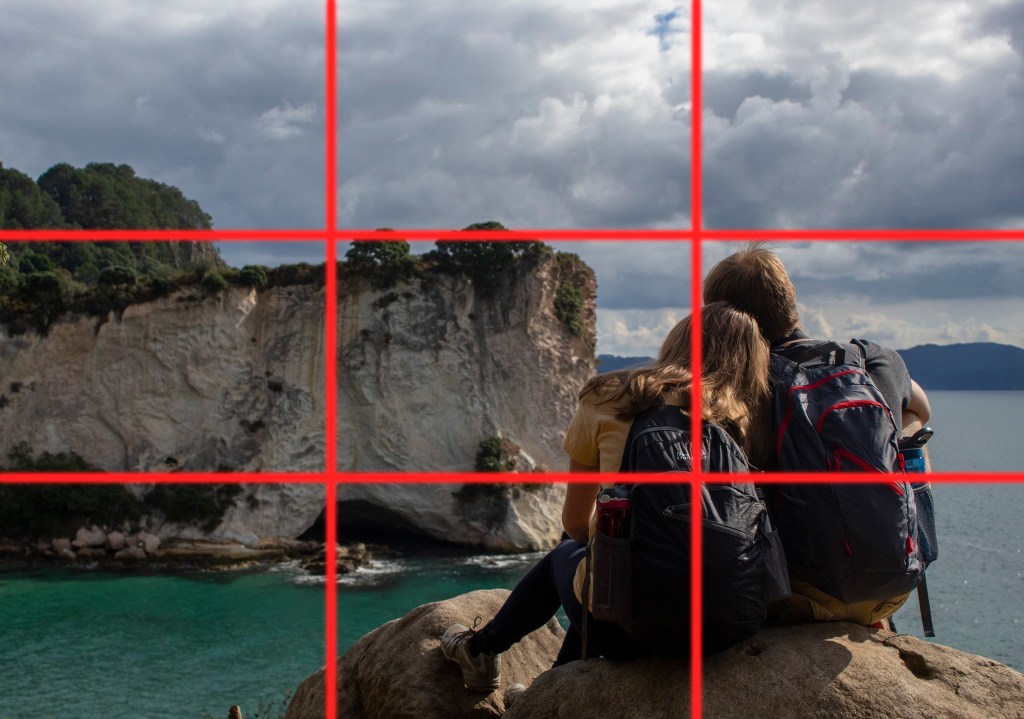
Position horizons in landscape photos along one of the horizontal lines as a way to use the rule of thirds technique easily.

This technique will help you realize why many photos are aesthetically pleasing to the eye. You will have an initial mindset to work off of to help your shots have a foundation. And once you’ve mastered this concept, you can still take some epic shots by breaking this rule and experimenting.

In the editing process, you can add the grid lines to achieve a better composition. If you are using Lightroom, press ‘R’ on your keyboard to toggle the rule of thirds onto your image. In Photoshop, there is not any keyboard shortcut, but you can add your own guides by going to View>New Guide. You can also go to View>New Guide Layout and specify 3 columns and 3 rows to use repeatedly in Photoshop

Editing RAW photos

Check out some of the basic capabilities that Photoshop RAW editor allows you to do with some of your photos!

No, I am not talking about raw meat.

RAW photos are unprocessed images that contain the raw image data captured by your digital camera’s sensor. JPEG images are immediately compressed, but raw images are saved with more room to adjust all the settings seen in the video and more. Professional photographers prefer to shoot in RAW mode instead of jpeg to have more control of the photo editing process.

Photoshop RAW Editor comes directly with the purchase of Photoshop, so it is a handy tool to have if you’d like to do some convenient editing.

Some downsides to shooting in RAW mode:

  • RAW images take up more storage than the compressed jpegs
  • Some image viewing programs might not recognize RAW files
Before
After

The 3 Major Components of Photography

Photography is constrained by light and the equipment receiving it. As the photographer, it’s your job to control the amount of light that is produced within your image. The three major components of photography are how you produce your image: ISO, aperture (A or Av), and shutter speed (S or Tv).

ISO
Aperture
Shutter Speed

Aperture:

The aperture measures how ‘wide open’ the lens is allowing more or less light to come in and also affecting the picture’s depth of field. The number is shown as f/stop, where x is the number between 1.2 and 22. The lower the number, the more light can come into the lens. The lower the number, the shallower the depth of field. Higher f/stops are great for photographing landscapes ensuring a clear picture. Low f/stops allow closer objects to be clear and the background to blur.

With an aperture of f/6.3, the subject remained clear and the background blurred in this image.

ISO:

ISO is the element of the camera that measures the image sensor’s sensitivity to light. There is a certain balance between sensitivity and image quality, so ISO can play a major impact on an image. The lower the ISO, the slower the sensor reacts to light. The higher the ISO, the grainier the image can become. This noise in the image cannot be removed, so its best to try to keep your ISO at the lowest possible setting (which in most cameras is 100) and increasing or decreasing your aperture and shutter speed.

In this image, the high ISO (6400) created noise and looks grainy

Shutter Speed:

Your camera’s shutter speed is responsible for changing the brightness of your photo, and either freezing action or blurring motion. This is determined by the length of time your camera spends taking a photo. A fast shutter speed is used to freeze an action such as a moving animal or athlete playing sports. A slow shutter speed can be used to blur motion or capture more light. Tv (S) priority setting allows the camera to adjust with its primary settings. This priority setting is easiest to use when first beginning photography so you don’t have to worry about missing out on a great picture.

This image was taken with a shutter speed of 1/3,200. Fast shutter speeds freeze movement.

Hobby Lobby Challenge

The Hobby Lobby Challenge is a great way to have fun with friends and provides an easy backdrop to create stunning photos.

Want to take amazing portrait pictures but the weather is not cooperating? Go to Hobby Lobby! The #HobbyLobbyChallenge reportedly started in 2018 by photographer Kelsey Maggart. The challenge asked its participants to post amazing pictures that just so happened to be taken in the store’s aisles. Get fun and creative with the store’s extensive flower section while taking great photos.

It is best to have multiple people there to help position, add flowers, or join in on the fun. For these photos, make sure to set your camera’s aperture to a lower setting, such as f/5 or f/6 to make sure your person of interest is in focus and not the store’s aisles behind them.

When editing these pictures, you may notice your subjects look pale from the fluorescent lights. Play around with the temperature and saturation of the picture. Fluorescent lighting usually has more of a yellowish-green tinge to it, so fixing the temperature of the photo to match the mood you want to create will fix the picture.

Most importantly, have fun with the photo shoot. If you’re not doing this with friends, ask the subject to do silly things first before shooting serious photos.

Moon Photography

A supermoon is when a full moon is the closest it is to Earth during its elliptical orbit. This perigree is what makes the moon appear larger.

With the right equipment, it is actually pretty easy to get a photo of the moon. Some DSLR cameras, like the Canon Rebel T6 that I use, come with a long lens. These lenses make it easy for objects far away to become clear.

To capture the moon, it is best to use the long lens and zoom as close as you want for a picture of the moon. It is hard for your camera to automatically focus, though, so you will need to switch to manual focus. This can be changed on your lens as you see in the left picture from auto focus (AF) to manual focus (MF).

To further prevent your image from coming out blurry, use a tripod to level your camera. A remote clicker will also help create sharper images because you are not physically touching the camera which could cause the tripod to shake. For the above picture, I did not use a remote and was sitting on the ground holding the tripod up. I do not recommend this!

Your settings for moon photography should be set in manual mode. I found it best with a shutter speed of 1/100-1/125th of a second, the aperture set at f/11, and the ISO at its lowest setting. Also, make sure to shoot in RAW.

It’s easy to overexpose the moon, especially a big, bright super moon. Make sure to keep your ISO low and your manual focus on the moon to prevent the picture at the right from happening.

All of the above images were shot in a parking lot close to a big city. You can see in the first photo how it looks much hazier than the last two. This is because of the Earth’s atmosphere (which could contain clouds, air pollution, dust, or humidity) stands in the way of your picture. I recommend taking your pictures when the moon is at its highest for a better, clearer picture.

Automatic Vs. Manual

The photos above were taken with automatic, which is a great place to start, but learning manual will further your photography expertise.

You’ve just gotten your new camera and have been taking photos left and right. You’re amazed with the quality of the pictures you’re getting, but struggle when the automatic flash wants to come out, can’t get the focus on the right object and some photos are just coming out overexposed or blurry.

Time to switch to manual mode.

Manual settings (M, Canon/ M, Nikon) allow the photographer to craft their own end goal for a picture. This creative control allows you to take it one step further than the camera might want to risk, giving you a picture that is totally unique and all yours.

While using automatic (A, Canon/Auto, Nikon) may be easier, manual gives the photographer control over all aspects of the photo such as shutter speed, Aperture, and ISO. There are semi-automatic settings such as Aperture priority and Shutter priority that are easier to ease in to manual mode. These will be talked about in later posts.

All in all, automatic is a great place to start for beginners, but it ultimately restrains the photographer from learning how to get their best shot. In later lessons, I will teach you how to use manual settings and the different priority modes.

Introducing Myself

So why have I made a blog, you may ask?

For starters, yes, it’s for a class. Our main goal is to learn how to use the tools of social media through different platforms like Facebook, Twitter and Instagram. While we peruse all three of those social media every day as a part of our own life and brand, it’s a totally new experience to be writing as yourself but not for yourself.

I have four main goals for this blog:

  1. Help beginner photographers become more confident in their work
  2. Learn new ways to educate through tutorials and graphics
  3. Share my photography with others
  4. Pass this class

I got my first camera almost two years ago due to a photography course I was taking for school. During our May Term, students have the chance to go abroad for a whole month, and it just so happened this photography course was headed for New Zealand. Taking that trip has changed my life and I would like to go back as soon as I can.

I am NOT a professional photographer, so this will be a learning experience for all of us. With graduation looming nearer, I would like to say I hope to continue this website for my benefit, and yours too.

Milford Sound, New Zealand