Taking Photos of Bees

ISO 400 – Exposure 1/1600 – f/5.6

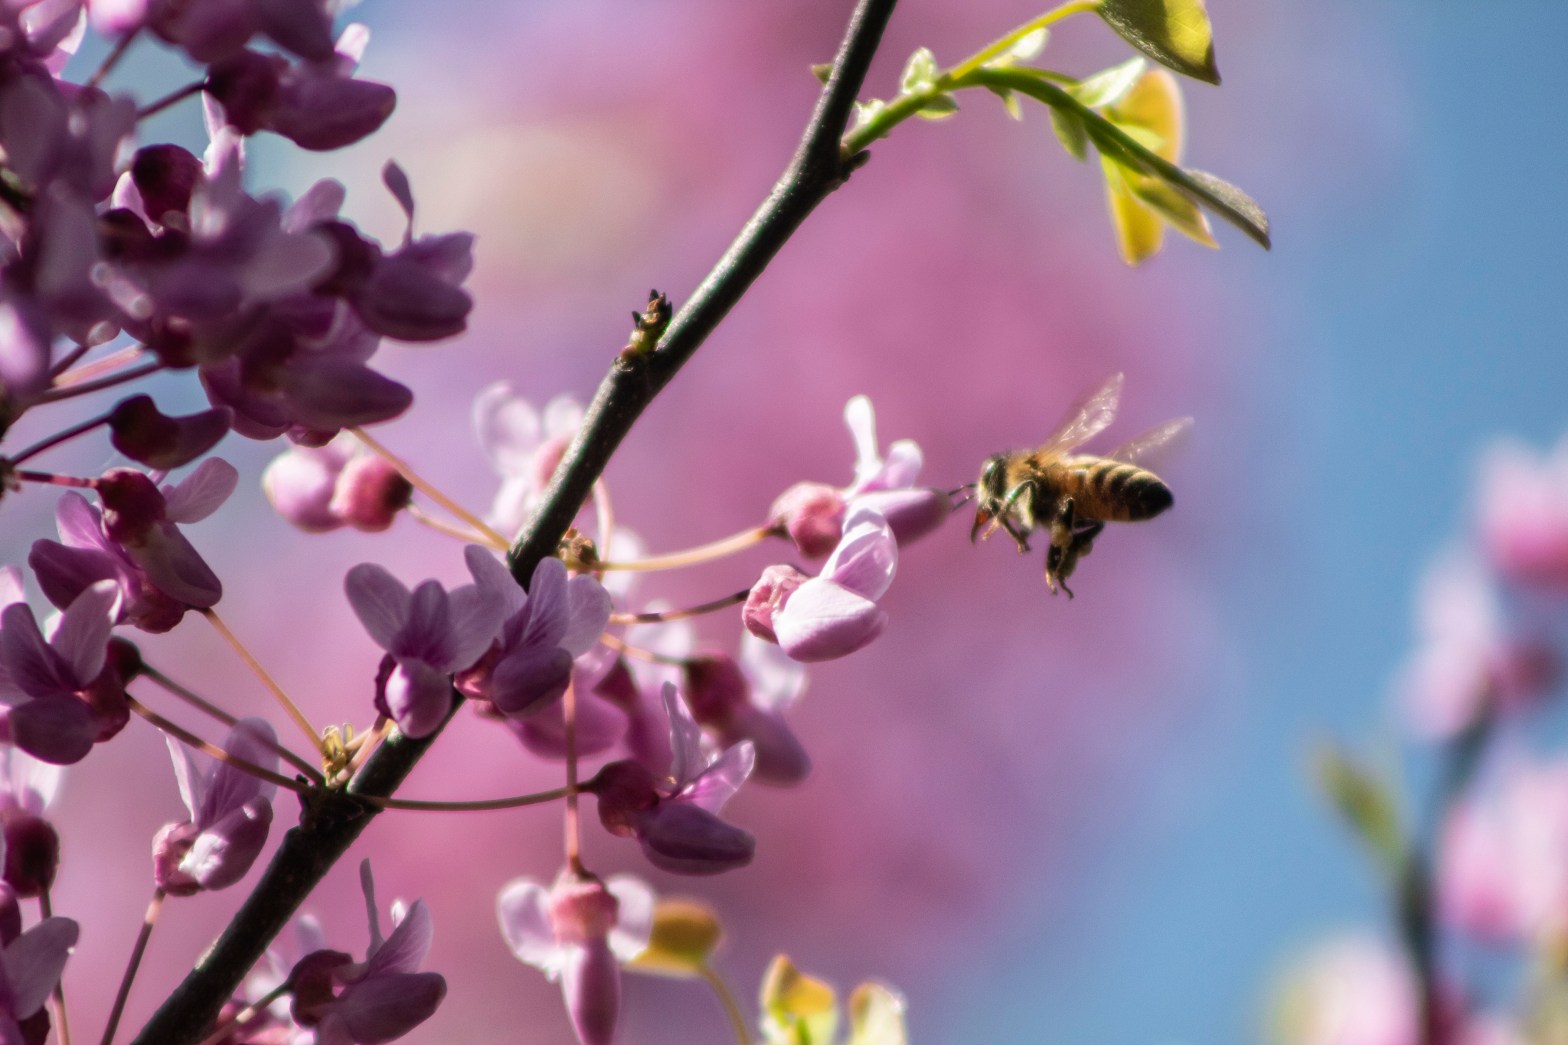
April showers have brought May flowers… and also bees! In North America, there are over 4,000 different species of native bees (not the murder hornets). Bees provide a crucial part in our ecosystem, but they are also fun subjects for outdoor photography. To take your own photos of these little workers, follow the steps below.

Patience is the number one ingredient you’ll need in order to take photos of bees. They fly quickly from flower to flower and are constantly moving. Even when not flying, their wings, antenna, or legs are in motion. Take a few minutes to observe the bees and let them adjust to you being there. Notice any flight patterns so you can predict when they’re going to hover or land on a flower. For just these few good photos, I took about 50 photos within two hours. Be patient and don’t be afraid of taking a lot of photos.

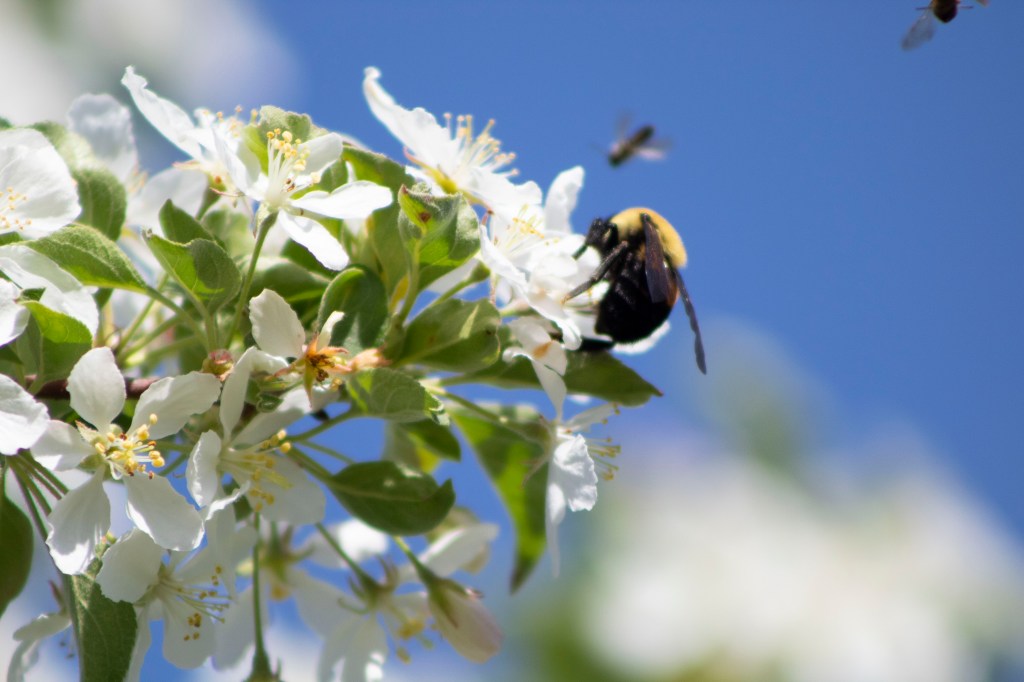
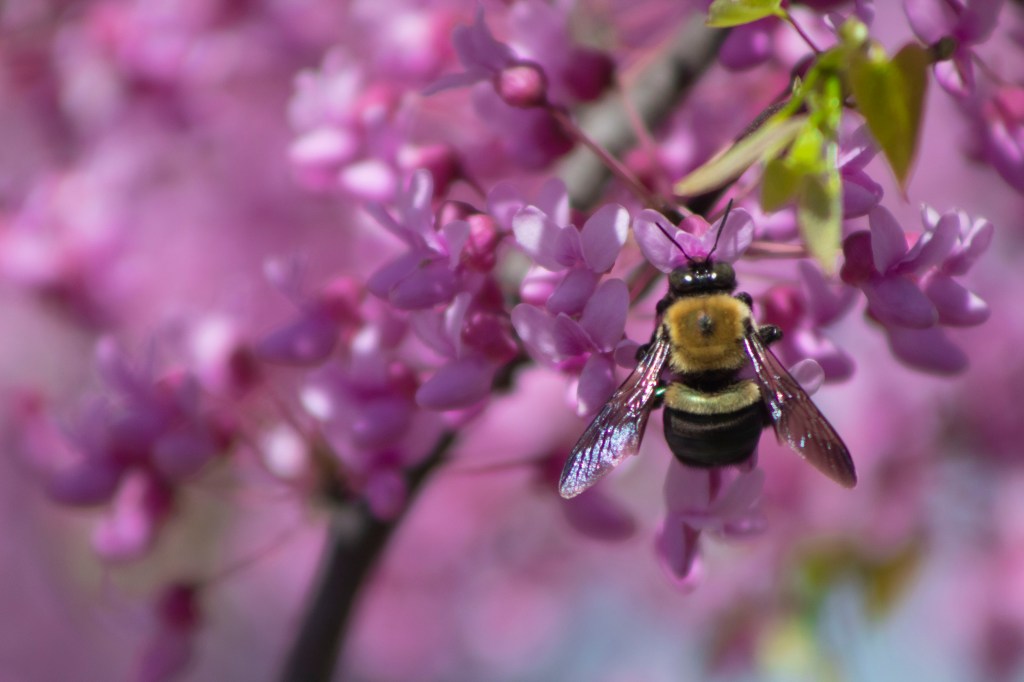
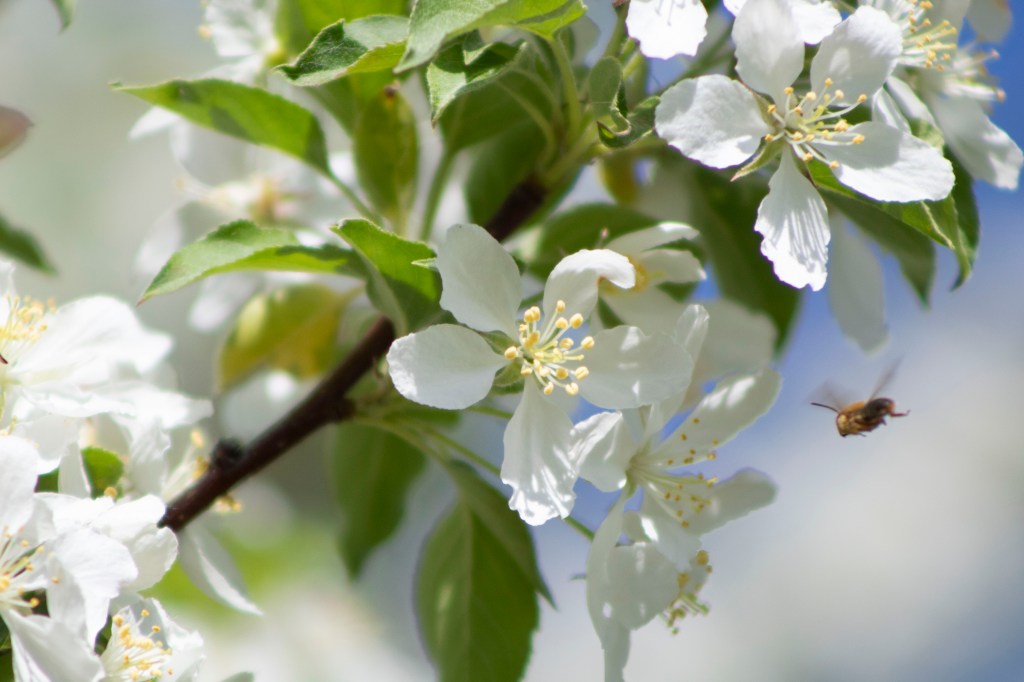
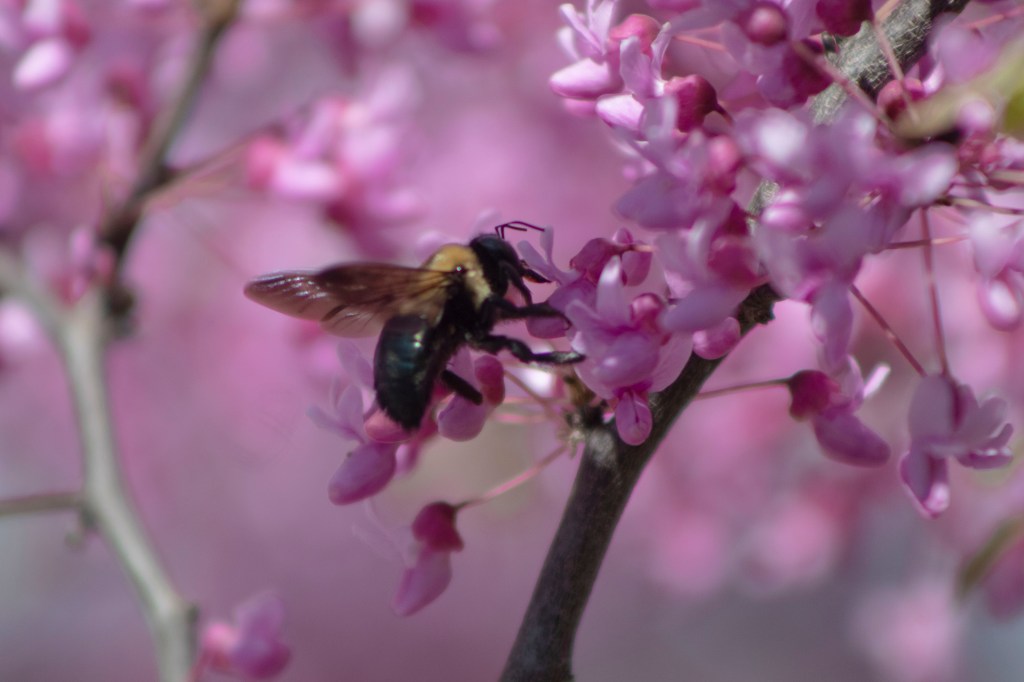
Finding flowers with flatter, more open surfaces are better to capture bees. You could get some bee butts if the flowers have much deeper crevices they have to crawl into, but flowers like sunflowers, chicory, butterfly weed, or zinnias are all wider and more colorful surfaces. In my pictures, I was photographing bees at eye-level by our redbud and crab apple flowering trees.

Different times of the day will determine how fast the bees are going. Early in the morning, bees and other insects have not had time to warm up, so they move much slower when the temperature is cooler. This allows your shutter speed to be slower than what it would be during the day. During midday and afternoon, your shutter speed will have to be much higher to capture their faster movements. A fast shutter speed also means a high ISO, so watch out for any noise in your pictures. I took mine in the afternoon with my 75-300mm zoom lens.

Tripods and certain lenses can be used to get your perfect shot. If you’re a little cautious about getting close to bees, use a zoom lens as I did so you can be far away from their buzzing. It’s also important to not get too close where it would disrupt the bee from its work. Setting up a tripod would be best in the morning while your camera is at a low shutter speed in low lighting. By midday and afternoon, you can go to handheld without worrying about shakiness.

Quick Note: If you’re allergic to bees, I would not recommend taking photographs of them! In the hours I spent outside with them, I was not stung or attacked by one. Just keep your movements slow and don’t provoke them.

Prisma Photo App Review

Awarded App of the Year 2016, Prisma is an app that puts filters over your existing photos to create cool works of art. It’s free to download, however, you only get 3 free days and then they’d like you to subscribe for $7.99 a month.

You can apply filters to photos in your library or take new photos right on the app. It’s compatible to use on both Android and iPhones, so everyone can use it. There are a ton of free filters available on there, and many more to unlock if you upgrade to the subscription.

The filters you apply are at a default of 100%, but you can use the slider to lower the opacity of the filter so it’s not as harsh. You also have the capability to share or save the photo once you find the filter you like.

Overall, Prisma is a really great app to try out if you want to put an artistic flair on your photos. It’s easy to use and gives you a bunch of free options. I had a great time changing the look of my photos on there because it always came out in a cool way I wouldn’t expect.

Pet Photography Tips

Pets are some of the most important members of the family. They are also very photogenic subjects for photography, but can be difficult to capture. Below are some tips on how to get the best picture of your pet, no matter their size.

Minimize distractions

Less distractions will help keep your pet’s focus on you. So if there’s a lot of people and noise, it might be best to move to a different location. If a setting is quiet, a sudden noise from you might get them to make a more interesting reaction.

Use treats

Dogs love treats (who doesn’t?) and so having a few on hand will help you get their attention. Toys also work well; there are even some dog squeaky toy apps out there that will help you to get your pet to look! Cats respond better to motion than they do to sounds, so keep some string handy.

Assistant help

If you have another person there to help you, that will minimize the multi-tasking required. It’s still possible without an assistant, but just easier with another person. For dogs, it might help to keep them on a leash if they try to run away from your site. Or you can always chase after them for some movement shots.

No on-camera flash

Highlighted in my last post, Creating a Mood, using the on-camera flash makes the photo look unnatural. This could also agitate the animals and put glare in their eyes. If you’re using an off-camera flash, consider pointing it up towards a ceiling to bounce the light for a softer look. Try to utilize natural light as much as you can!

Be patient

The most important factor in doing pet photography is to be patient. Your animals might be alarmed about the camera at first, so waiting until they’ve settled down will help your shooting. If your pets are quirky, just wait until they start doing their usual habits to capture that personality. I like to follow my pets around and wait and see what they do.

Keep eyes in focus

Eyes are a must in pet photography, as it speaks to the viewer without words. By getting down to your pet’s level, it’s easy to focus on the eyes and make it seem like they’re right in front of you. Your camera’s automatic focus will focus on what is closest to the camera, (the nose), and so it’s best to change your focus to manual or ‘single point’

Wildlife Photography Tips


Check out these tips from ecologist, Aurora Hood, on how she takes her wildlife photography. She currently uses a Cannon PowerShot SX530 HS, but will also occasionally use her Samsung Galaxy S10 for shots that don’t require any high-quality zooming.

1) Always bring your camera

For this photo, I was out for a walk at a salt-marsh when we happened to duck into a bird hide to rest and have a snack. While we were there, all of the waders outside slowly made their way over to our side of the water. I was able to get several photos of this cutie preening as I ate a sandwich. ALWAYS bring your camera along, even if you don’t expect to take any photos.

2) Always take multiple shots of the same photo

A big difference between wildlife photography and other forms of photography is that you are totally at the mercy of nature. You never know when the lighting will change, your subject will move, etc., so it’s better to hedge your bets the best you can. You never know what sort of photo you might get by taking a few extra shots. In this photo (out of about 48 total, I may add), I was able to capture the full height of this little guy’s song, mostly by just taking lots of photos as fast as possible. Sometimes quantity can go far to increase your quality!

3) Do some research… but bring your luck too

For example, if you want photos of deer, going out at dawn or dusk will give you the best chance at seeing them at their most active. However, when you go outside to find subjects to shoot in the natural world, you can do everything right and still not get the shot you want. Sometimes you just need to be in the right place at the right time. In my photo of the Barred Owl, I left in the morning for the sole purpose of shooting some winter birds. Instead, I came across this beautiful owl. All of my birdwatching experience told me that I would never see an owl sitting in broad daylight, yet there she was.

4) Use a high shutter speed

Since I am usually taking photos of birds who I sometimes think move about just to spite me, I tend to have my shutter speed around 1/1000. This lets me get high quality photos even when the subject is moving, as was the case with this hungry Olive Woodpecker. However, your shutter speed also affects how much light gets into your shot. When shooting in lower light conditions, lower your shutter speed to get the brightness right. This may affect your camera’s ability to get a clear photo of a moving subject, but with some practice, you’ll soon be able to make these adjustments fairly intuitively.

5) Remember composition

Although the subject of your photo is often beautiful by itself, framing, lighting, and setting are all equally important to a great photo. In this photo of a sunbird, the long aloe flower stalks take up more space than the actual bird. The stalks allow the viewer’s eye to be pulled to the intended subject, who is framed neatly by the vegetation. Not only does this make the photo aesthetically pleasing, but also adds context and a story. It’s also important to note that wildlife photography doesn’t need to be National Geographic-level closeups; sometimes a wide shot can be just as interesting.

6) Be curious

Wildlife photography encompasses all wildlife, not just the “charismatic” ones! Take photos of whatever you find beautiful, whether it’s a bear, bird, or bug. Don’t be afraid to experiment with subjects you aren’t necessarily familiar with; you can always find out more about them later.

7) Find places to practice

Zoos are amazing places to hone your skills! Whether you’re working on understanding your camera settings or not used to how animals move, zoos allow you to take photos in a much less “high stakes” environment. In general, zoos allow you to get much closer to animals than you would in the wild and also give you a wide range of subjects to work with. Don’t forget to tag the zoo in your social media posts; it isn’t cool to pretend you got those shots in the wild!

8) Stay respectful

Too often, clashes between humans and wildlife can harm one or both parties. Always stay at a respectful distance from your subjects and let them come to you, when applicable. Take note of the body language of your subjects and be ready to back off if they begin to look agitated or afraid. Also be aware of the situation you’re getting into; for example, if you are shooting a mother with young, you will need to allow more distance than normal and back off immediately if the mother begins to look agitated. For more information on how to safely keep your distance from wildlife, check out National Geographic or the National Parks websites.

Knowing more about Aurora Hood:

“I got into wildlife photography simply because of my love for nature. I love photography because it allows me to capture the amazing moments I experience while out in nature and share them with others. As an ecologist, wildlife photography also lets me share the importance of nature with the general population; I always hope that maybe one of my photos will help convince someone to go outside and connect with the outdoors in a way that they might not have otherwise.”

Professional Headshot Tips

Headshots are the first impression of your personal brand. Whether that be for resumes or your social media platforms, headshots are important in conveying your personality to your audience. Before you go and take a selfie, check out these tips that my fellow photographer, Corinne Thomas, made for both DSLR and phone cameras that have portrait mode.

Photo by Corinne Thomas @photography.by.corinne

Inside:

  1. Find a blank wall and a well lit room.
  2. Sit in a chair at an angle, with your shoulders facing the camera.
  3. If your phone camera supports some sort of portrait mode, use that but change the f-stop number (more than likely set at f2.8) to 5 ish, or adjust it until it is up to your standards! Changing the number to a higher one helps eliminate portions of blurred hair. You can also change it after the photo is taken.
Photo by Corinne Thomas @photography.by.corinne

Outside:

  1. Blank backgrounds are hard to find outside, so using a brick wall, a column, or even a grassy hill. 
  2. Portraits are best taken at the hour right before the sun sets. Try your best to be facing the sun without squinting, eliminating shadows.
  3. Use portrait mode!
Photo by Corinne Thomas @photography.by.corinne

Outfit Suggestions:

Since you will only shoot from the waist up, if doesn’t really matter what pants you wear. Try for non-patterned tops, a jacket/cardigan, necklaces, and ties for guys. Be sure that no hair is in your face. Sit up straight and don’t forget to smile!

Be sure to check out Corinne’s Instagram by clicking the link to see her great photography: https://www.instagram.com/photography.by.corinne/

//www.instagram.com/embed.js

Trip to Boston

Over spring break, I had the chance to take a trip to Boston, Massachusetts. The city was full of buildings that were a blend of old and new, and I loved that contrast of old brick and modern windows. While most of everything was closed due to the COVID-19, I was still able to get plenty of shots of buildings and sights that I wouldn’t normally see. Check out below some of my favorite pictures from the trip.

In Boston, we followed the Freedom Trail and visited the historical sights like the Old South Meeting House, the Massachusetts State House, the Old North Church, the Bunker Hill Monument, and some of the burial grounds.

We also got to visit Harvard and explore the beautiful campus there. My favorites were the Memorial Hall Church and the Cambridge Common park we walked around. Boston was a great experience and I will definitely have to go back once everything is open again.

Photography Book Review

DSLR Photography for Beginners by Brian Black.

This book boasts on the cover that readers will be able to “take 10 times better pictures in 48 hours or less”. While it hasn’t been 48 hours since I’ve read this book yet, I definitely feel more knowledgeable about camera settings, lenses, composition, and camera focus.

I was really happy to see many concepts in the book that I have already covered here on my website. Some are listed with their links below:

Black put exceptional detail in what lenses to buy and things photographers should know about each lens. As I only have a zoom lens and a normal lens, I would like to show you the other lenses Black talked about in his book.

Telephoto

“A telephoto lens is one that magnifies the image seen. … A telephoto lens is used for shooting subjects that are far away when the photographer either can’t get close to the subject or would prefer not to.” – Brian Black

Using this lens would be best for wildlife or sports photography. You don’t exactly want to get close to sports players during a game or a wild bear in the forest, so using the telephoto lens would be best.

Wide-angle

“A wide-angle lens is in some ways the opposite of a telephoto lens. … The magnification with a wide-angle lens is often somewhat negative, i.e. objects appear smaller or more distant in the photo than they are in reality.” – Brian Black

I could’ve used this wide-angle lens when I talked about panoramas in a previous post. They’re also great for architecture when you want to capture a whole scene instead of a single subject.

Macro

“Macro photography is used to capture close views of very small things such as flowers and insects. The lens does not have to be extremely close to the subject to take the picture, allowing close-ups to be taken of subjects that might otherwise by scared away.” – Brian Black

With its combination of low depth of field and sharp focus, Black recommends the macro lens be used in nature photography or portraiture.

Fish-Eye

“A fish-eye lens is an extreme wide-angle lens that deliberately adds a spatial distortion to the picture. … the distortion with a fish-eye lens is deliberate.” – Brian Black

The fish-eye lens allows photographers to be creative with their shots. The distortion creates a new way of looking at things, and is commonly used in landscape or building photography.

This book has many more concepts that I would like to touch upon in later posts, so stay tuned!

6 Tips for Flower Photography

Spring is right around the corner, which means more opportunities for pictures of flowers! Get your camera and find beautiful subjects in your own backyard.

Photo by Savannah Shilling

Here are my 6 tips for taking epic shots of flowers:

  1. Photograph on an overcast day

Is the weather not sunny enough on your spring day? That’s okay! White sky days are best for photographing flowers because of the soft light. Harsh light or shadows can ruin the picture. The photo below was done inside a greenhouse.

Photo by Savannah Shilling

2. Avoid background clutter

Try to keep your background with the least amount of distractions as possible behind your flower. Using a shallow depth of field can help this. Change your aperture to a wide aperture (low f/stop number) like f/8 or lower if you can.

Photo by Savannah Shilling

3. Wind is your enemy

Avoid windy days by doing your flower photography early in the morning or even taking your flowers inside. The picture below was taken in a greenhouse, so no wind was present.

Photo by Savannah Shilling

4. Backlight makes flowers glow

Another type of light is backlight. Backlight happens when the sun is directly behind the plant, making it seem like it is lighting them up. Flower petals and leaves are translucent, so the late or early sun will make your flowers appear to glow

Photo by Savannah Shilling

5. Change your perspective

Try new angles to create unique pictures. Viewers will not expect seeing a flower from underneath or behind because we’re used to a standing perspective. You can also take pictures of mushrooms and other foliage like the one seen below.

Photo by Savannah Shilling

6. Contrast is key

A good photo has a lot of contrast. To make the flower pop out of the background, pick a plant that sticks out, such as having a different color or shape. If there’s a group of flowers, try to focus on one unique thing about one flower.

Photo by Savannah Shilling

Making Panoramas in Photoshop

Check out how to use Photoshop to stitch together several photos to create a panorama

Have you ever wanted to get a whole landscape image but didn’t have a wide enough lens to capture it all?

Instead of struggling to get one image, take a photo series (about 3-6 images) one after another. Make sure to have some overlap to make it easier to piece together later, and also have a consistent exposure and white balance in each photo. This technique allows your pictures to be of much higher quality.

Creating your panorama:

  1. Open your photo series in Photoshop
  2. Go to File > Automate > Photomerge
  3. Next, a pop-up will appear for Layout and Source Files
    • Layouts will determine how your images will be blended together
      1. Automatic- this setting automatically picks the best Layout to blend your images together
      2. Perspective- the center image is used as the focus point and neighboring images are bent outwards. This can create a bow-tie effect which gets rid of any curvature, but can sometimes look odd
      3. Cylindrical- using curvature, this will cancel out any bow-tie effect. This creates great images, but the center image can sometimes look too bowed
      4. Spherical- This one is best used for night skies rather than flat landscapes. The images are put on a plane similar to a beachball, so lots of curvature
  4. Source Files allows you to choose your photos. If your images are already opened, simply click on Add Open Files. Otherwise, click on Browse and select your photos there.
  5. Click OK

Some panoramas may take longer to load, so just be patient when it’s creating your image. Once loaded, you might find that the edges are skewed and there is some transparent space between photos. (*using a tripod will help diminish this)

Editing your panorama:

  1. Go to Layer > Flatten Image
  2. Using crop, tighten the image to avoid white areas
  3. If there’s some white left, click on the Clone Stamp tool
    • Hold down Option(alt) > then click on the space you want to clone
    • Fill in any white space

Now you’ve got your final panorama! Save your image to create beautiful prints to frame or use for cover photos like I do on my website.

Aspect Ratios for Instagram

Instagram allows you to post in a number of different proportions, or aspect ratios. Check the infographic above to see the different ways your photo could be cropped to appear on the home feed.

Changing your photo size on Instagram can increase your engagement by over 67%, says WorkMacro. The study they did was on horizontal versus square videos, but the same applies to your photos with different aspect ratios.

Notice how the mountain photo (which is using a 4:5 ratio) takes up more space on a phone screen. By using a 4:5 ratio instead of the standard 1:1, this will help increase your engagement because a user’s eye will be drawn to it. Videos are given the widest ratio at 1.91:1, and take up the least amount of space.

1:1 ratio
4:5 ratio
1.91:1 ratio

Instagram ratios:

  • Widest Ratio: 1.91:1 (1080 x 566px)
  • Tallest Ratio: 4:5 (1080 x 1350px)
  • Square Ratio: 1:1 (1080 x 1080px)
  • Story Ratio: 9:16 (1080 x 1920px)

Most cameras take photos in a 6000 x 4000px, so Instagram will crop it immediately to the 1:1 square block. To get the most engagement, you’ll need to crop your image to a vertical ratio of 4:5. You can do this in two ways:

Photoshop/Lightroom

If you’re already editing your photo, cropping to a ratio is made easy with Photoshop and Lightroom. In Lightroom, simply go to the Crop Tool and size your image however you want. For Photoshop, I like to create a new document with the 1080 x 1350px dimensions, and then place the image in the canvas so I have more room to edit and move it if I’d like.

iPhone Photos

Simply go to your Photos and click on Edit>Crop>Sizing. Sizing button appears as three little squares in the bottom right corner of your screen. A pop-up menu of choices will let you choose which ratio you’d like to use. Click on the 4:5 and then press Done when you’re happy with your image. Choosing the 9:16 ratio for an Instagram Story is also an option too.

Note: iPhones take pictures at a 4:3 ratio and Instagram will post it as a square 1:1 ratio.