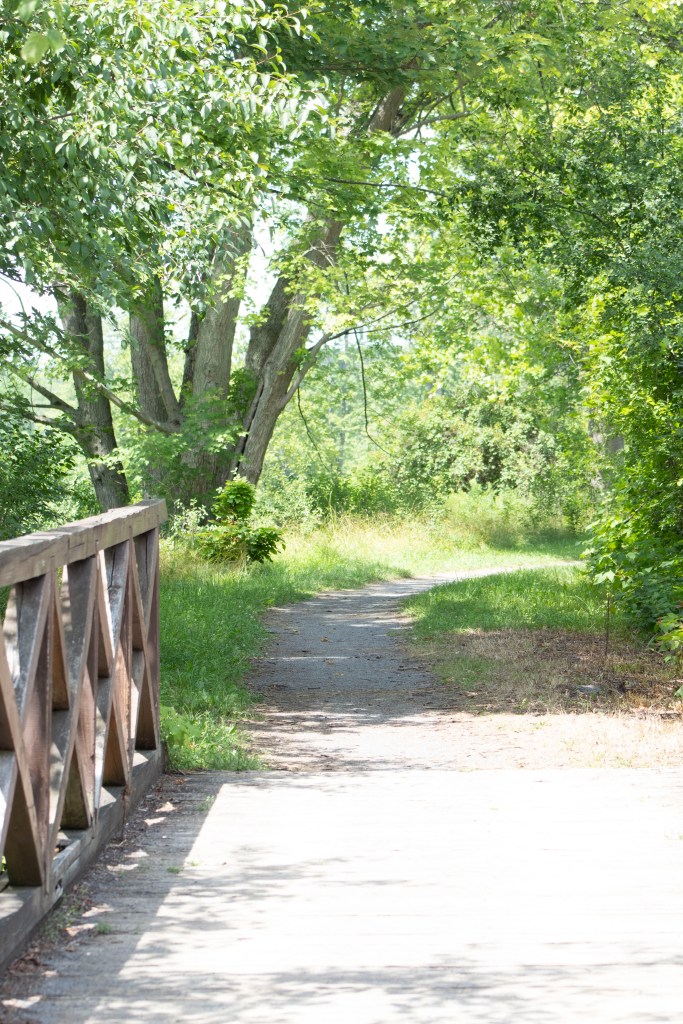
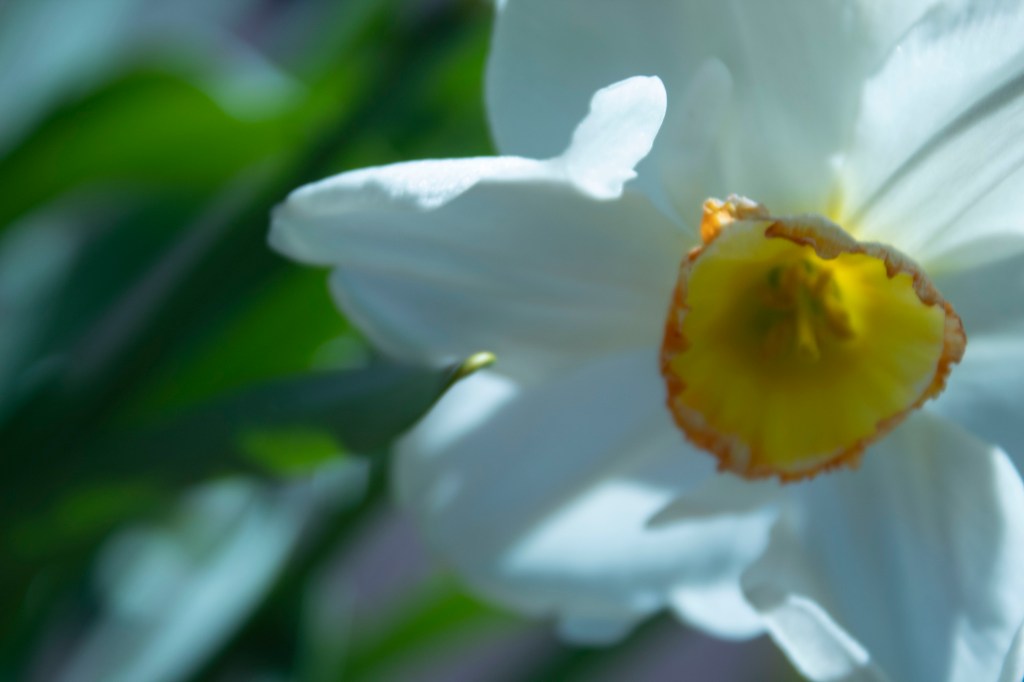
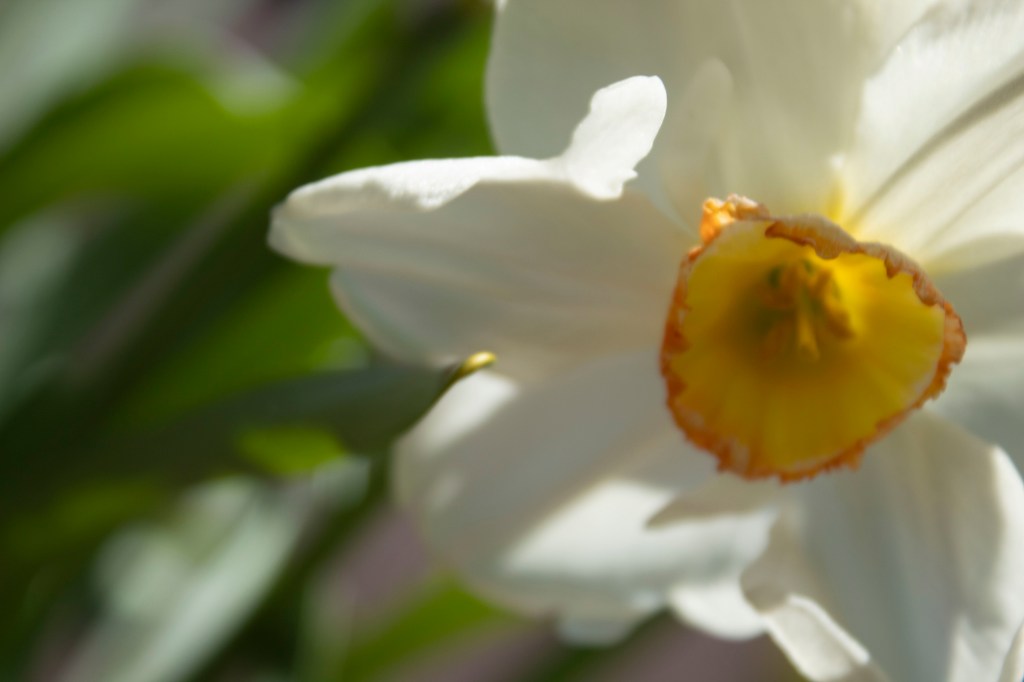
The photos above were taken with automatic, which is a great place to start, but learning manual will further your photography expertise.
You’ve just gotten your new camera and have been taking photos left and right. You’re amazed with the quality of the pictures you’re getting, but struggle when the automatic flash wants to come out, can’t get the focus on the right object and some photos are just coming out overexposed or blurry.
Time to switch to manual mode.
Manual settings (M, Canon/ M, Nikon) allow the photographer to craft their own end goal for a picture. This creative control allows you to take it one step further than the camera might want to risk, giving you a picture that is totally unique and all yours.
While using automatic (A, Canon/Auto, Nikon) may be easier, manual gives the photographer control over all aspects of the photo such as shutter speed, Aperture, and ISO. There are semi-automatic settings such as Aperture priority and Shutter priority that are easier to ease in to manual mode. These will be talked about in later posts.
All in all, automatic is a great place to start for beginners, but it ultimately restrains the photographer from learning how to get their best shot. In later lessons, I will teach you how to use manual settings and the different priority modes.
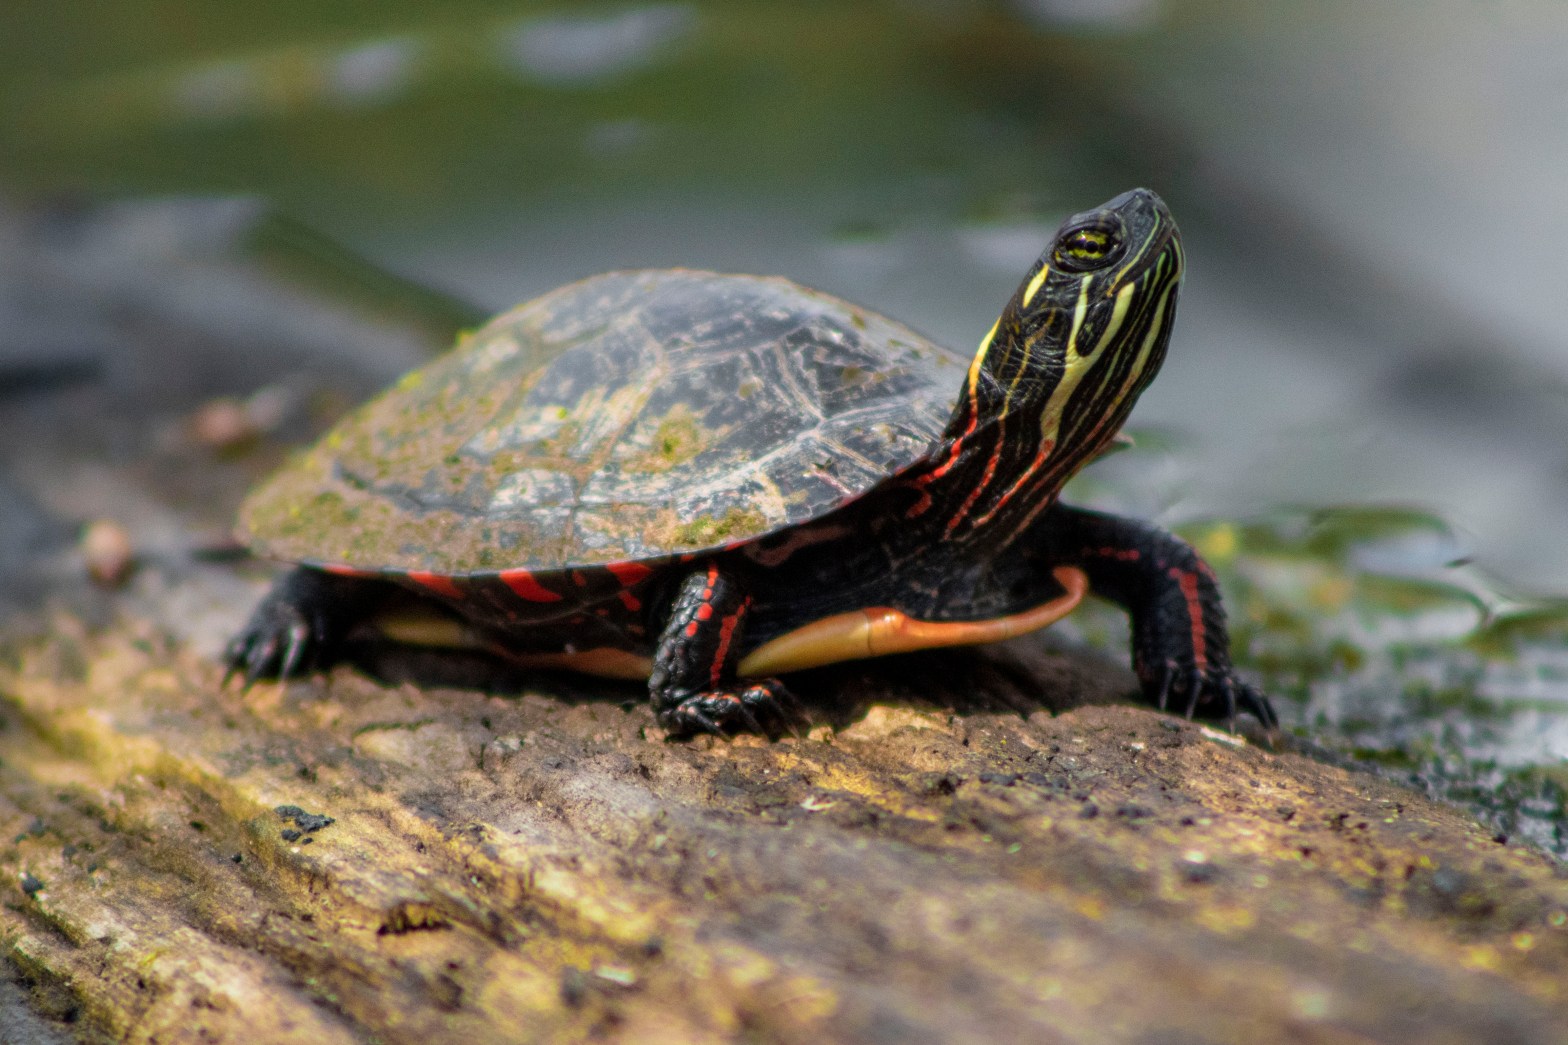
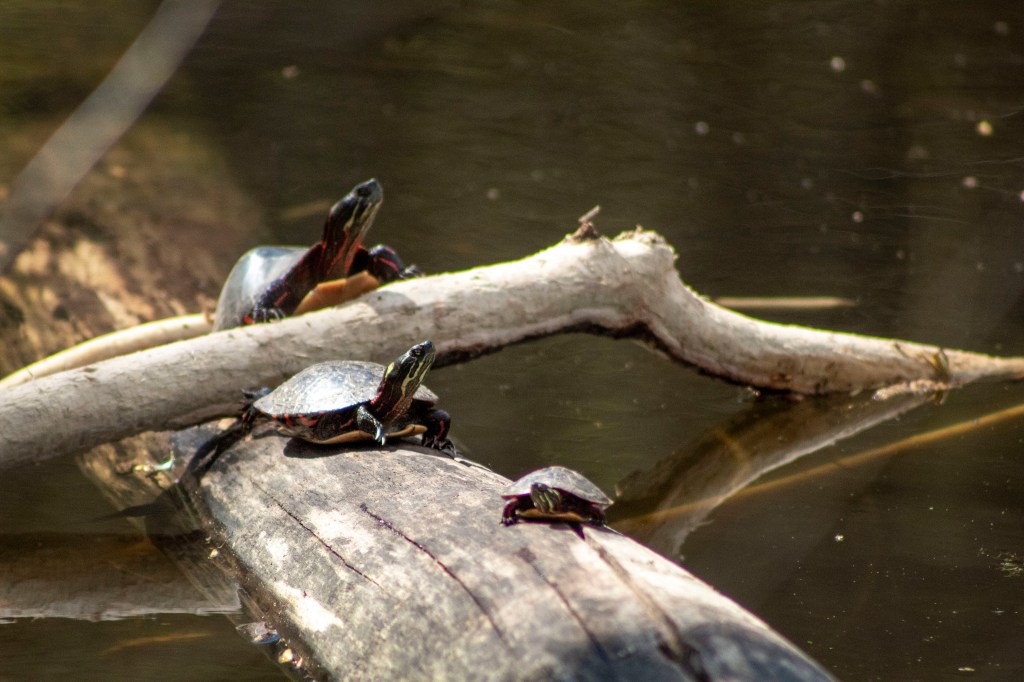
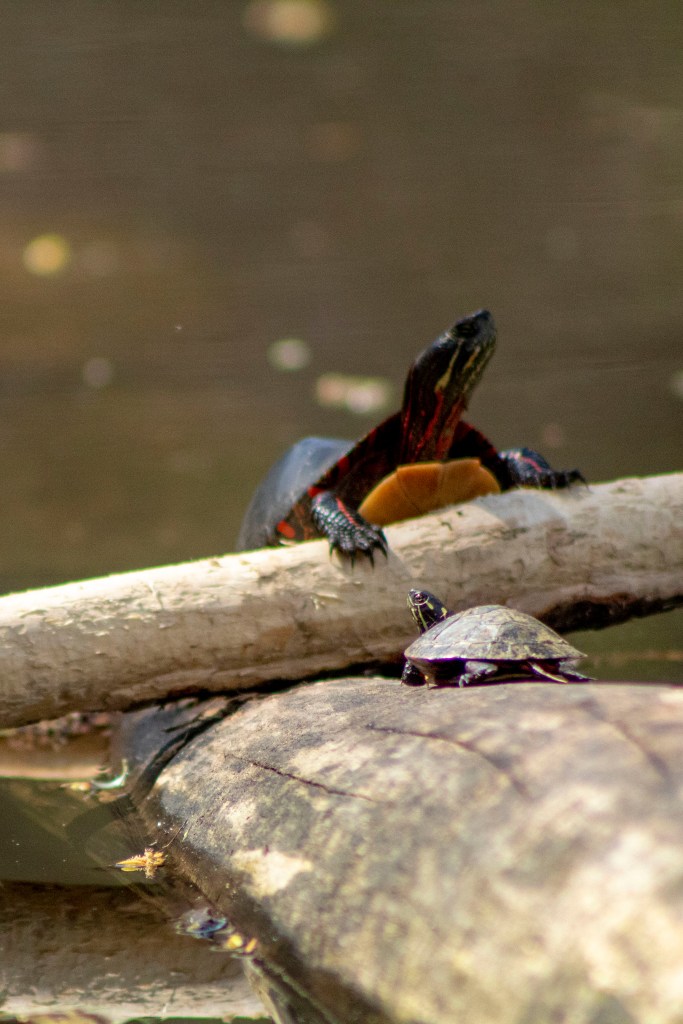
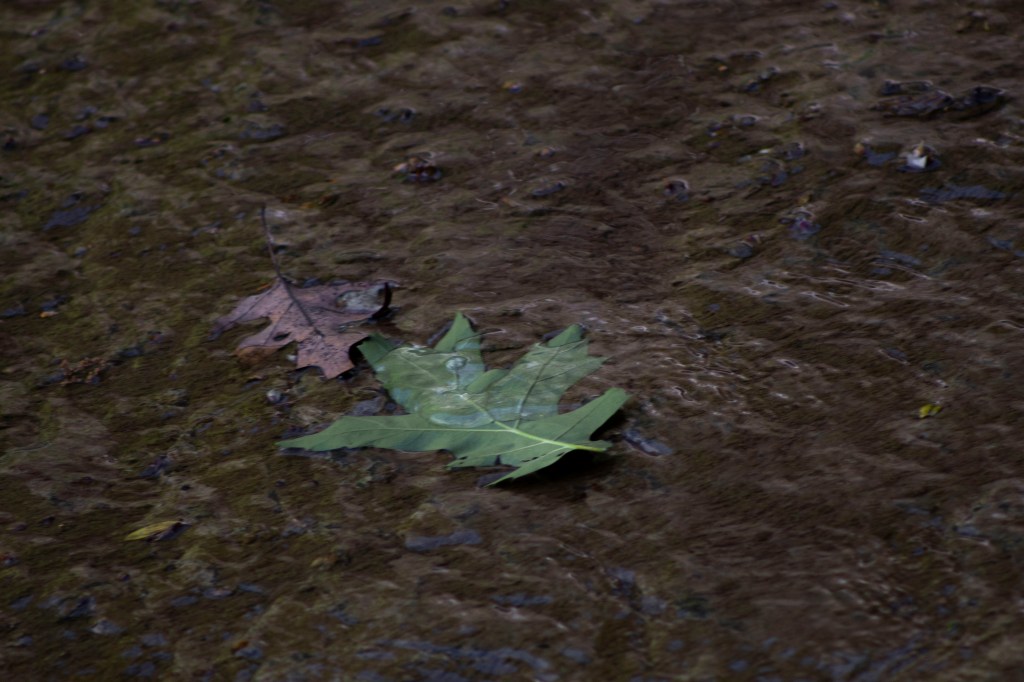
Baltimore Woods in Marcellus, New York, is known for its variety of birds. However, I believe the pond full of turtles in the far back of the park should be the main attraction.
This little park was full of well-marked trails and plaques with educational information on them. The park boasts its large volunteer effort, and this can be seen in its well-maintained trails and nature center.
With the first over 80 degrees day of the year, we were not surprised of the amount of turtles sunbathing on every surface they could find. Walking up to this pond, we could immediately see about 8 turtles on one log. Before getting in close enough for a picture, though, a family of four children came from a nearby trail and immediately ran to the embankment. Alarmed, all the turtles jumped back in the water.
Exercising caution around any animal is important as us humans are the one encroaching on their home. It’s important to stay quiet, not make any sudden movements, and not get too close to the creature. This can cause unnecessary stress and anxiety on the animal. Not everyone thinks of this, especially children, so I understand their excitement for seeing turtles in the wild.
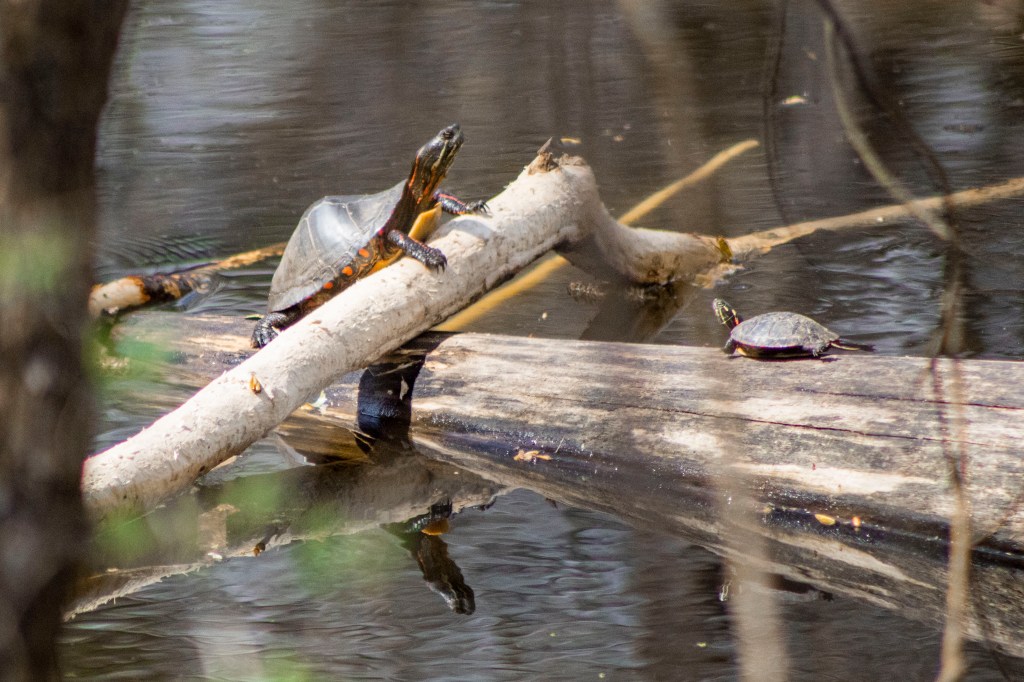
To capture these images, I used my Rebel T6 camera’s zoom lens. This allows a user to not have to get close to a subject, which is beneficial for the animals so you can remain at a comfortable distance from them. Originally spooked by the family, we sat patiently for the turtles to make their way back to their designated sunbathing areas.
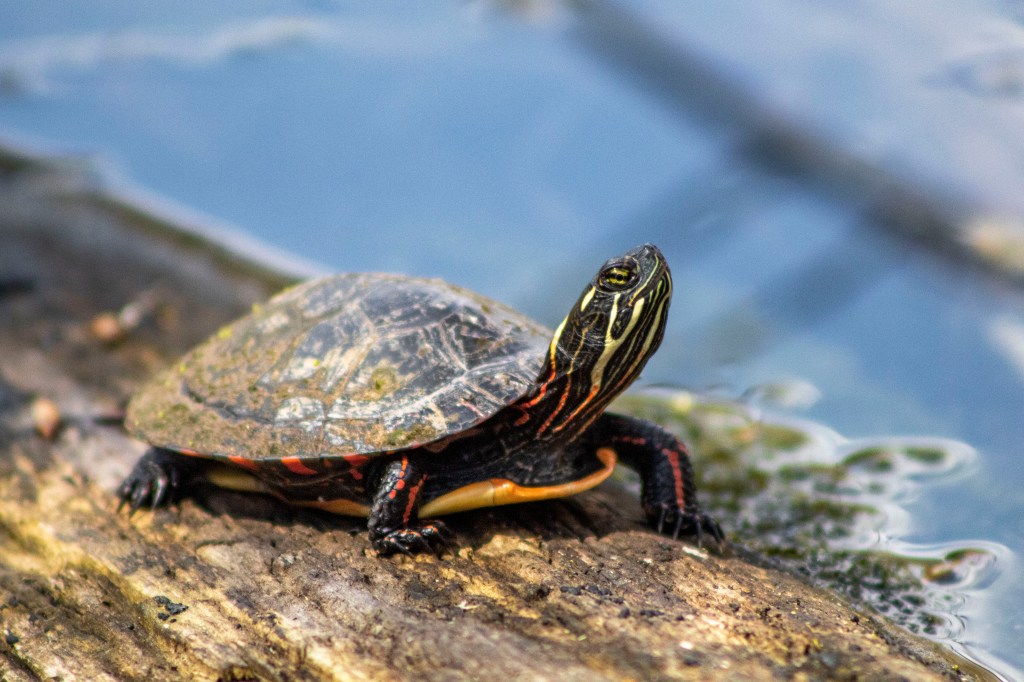
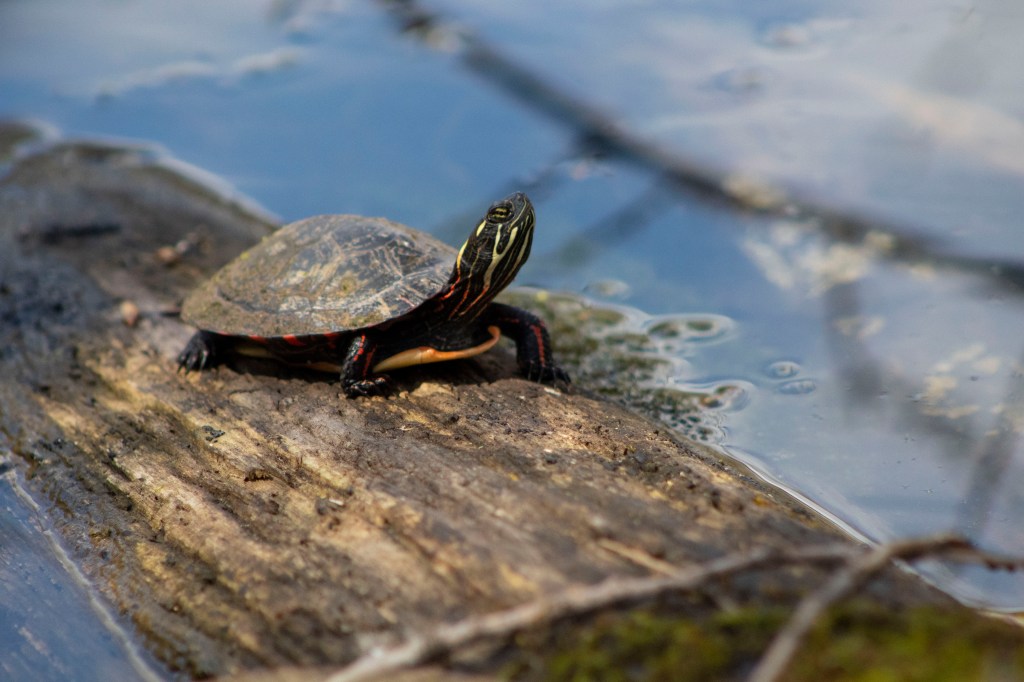
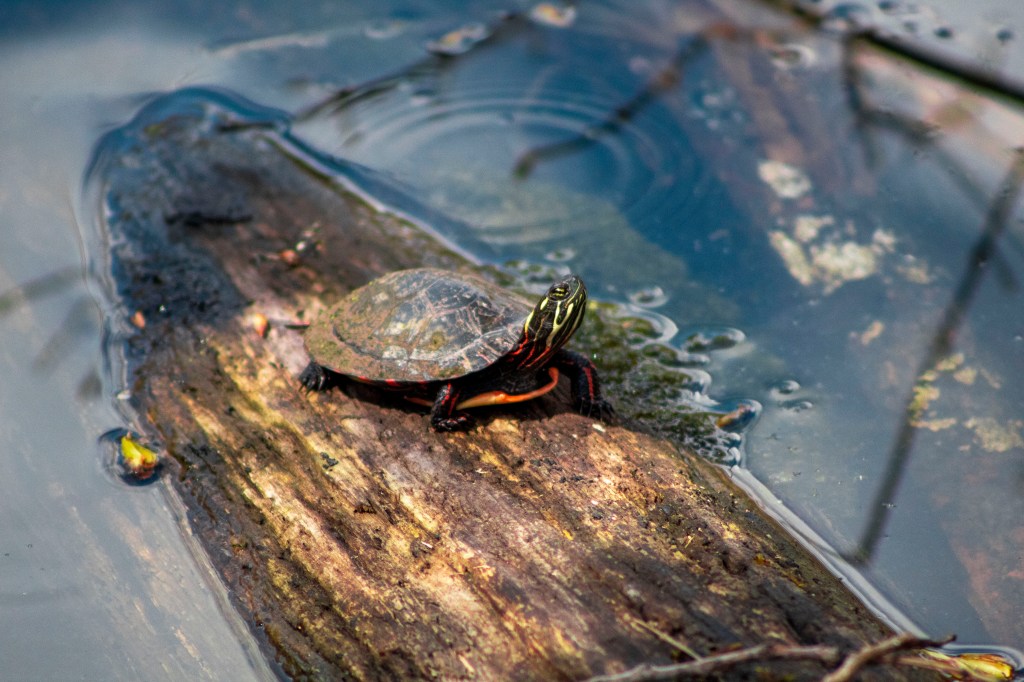
The downside to the zoom lens is that it’s much harder to get the correct focus on a subject if you’ve got a wide aperture on automatic focus. Notice how in the below photos the first turtle is clear while the other two turtles behind him are blurry. This was taken with a wider aperture than the second photo, that shows all 3 turtles much more clearly.
To remedy this, I found it best to take multiple shots while waiting for the camera to automatically focus. Another way to achieve your desired shot would be to use the toggle button on your camera to switch from automatic focus (AF) to manual focus (MF). This feature will be touched upon in later blog posts.
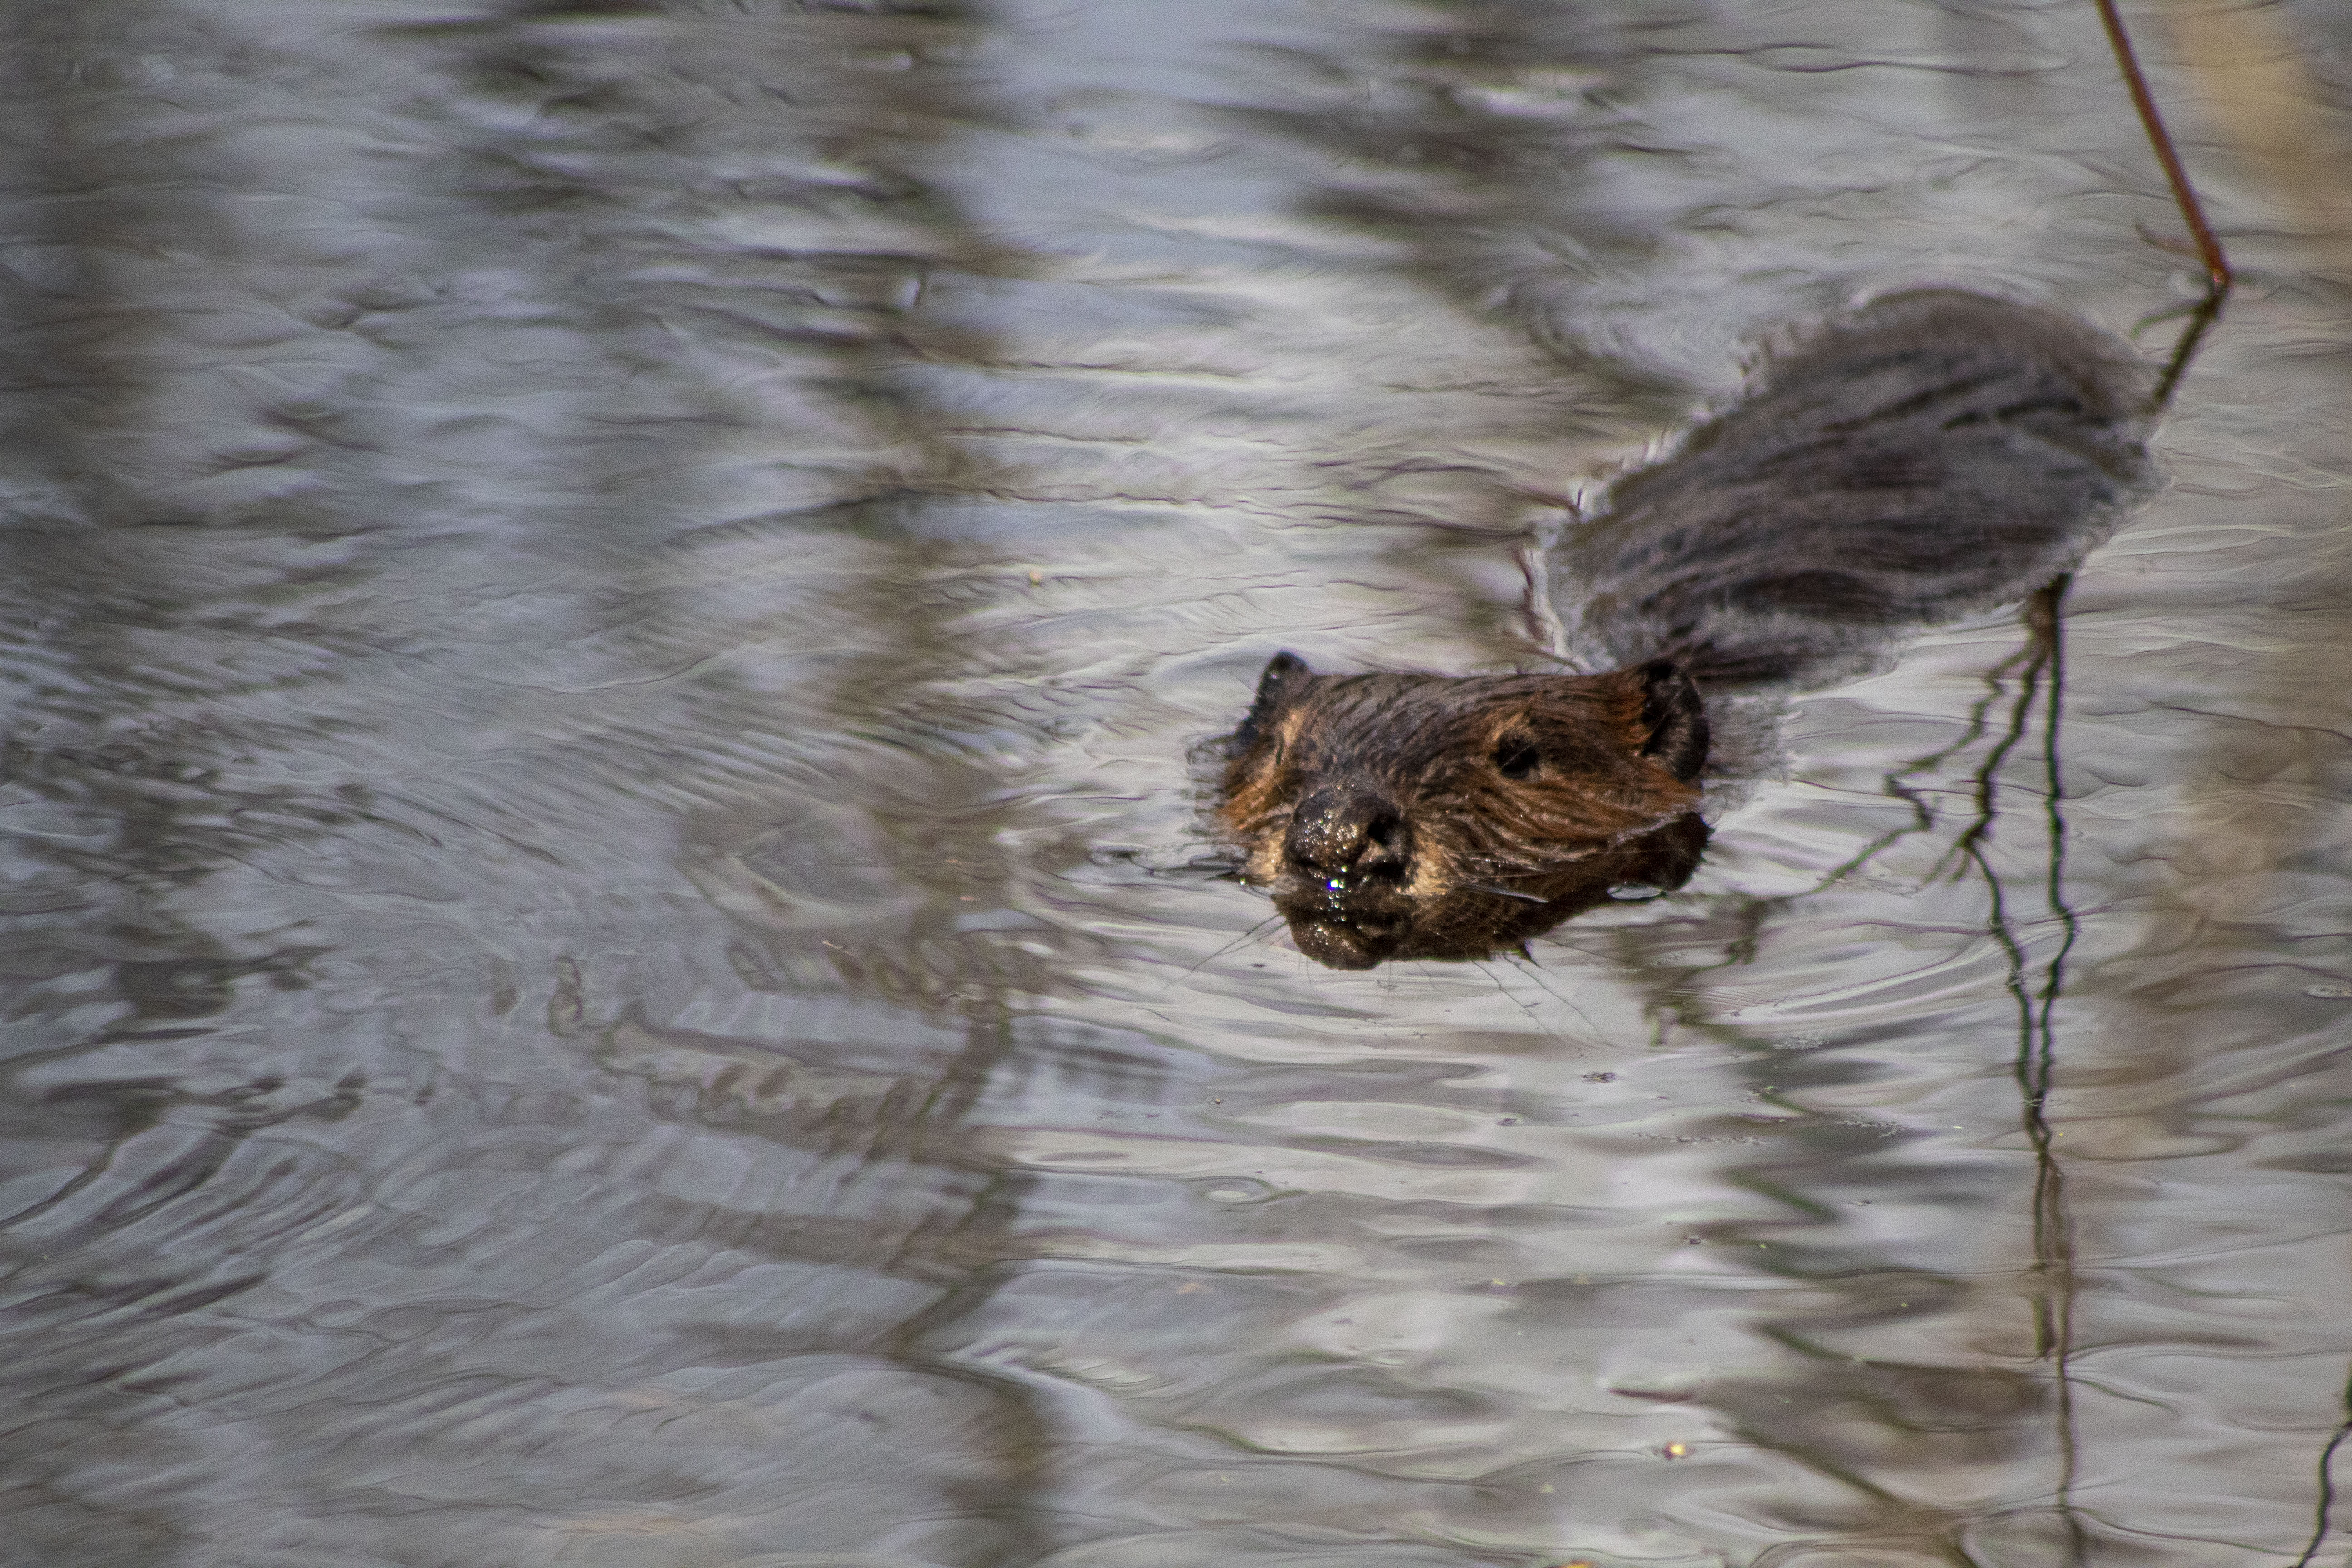
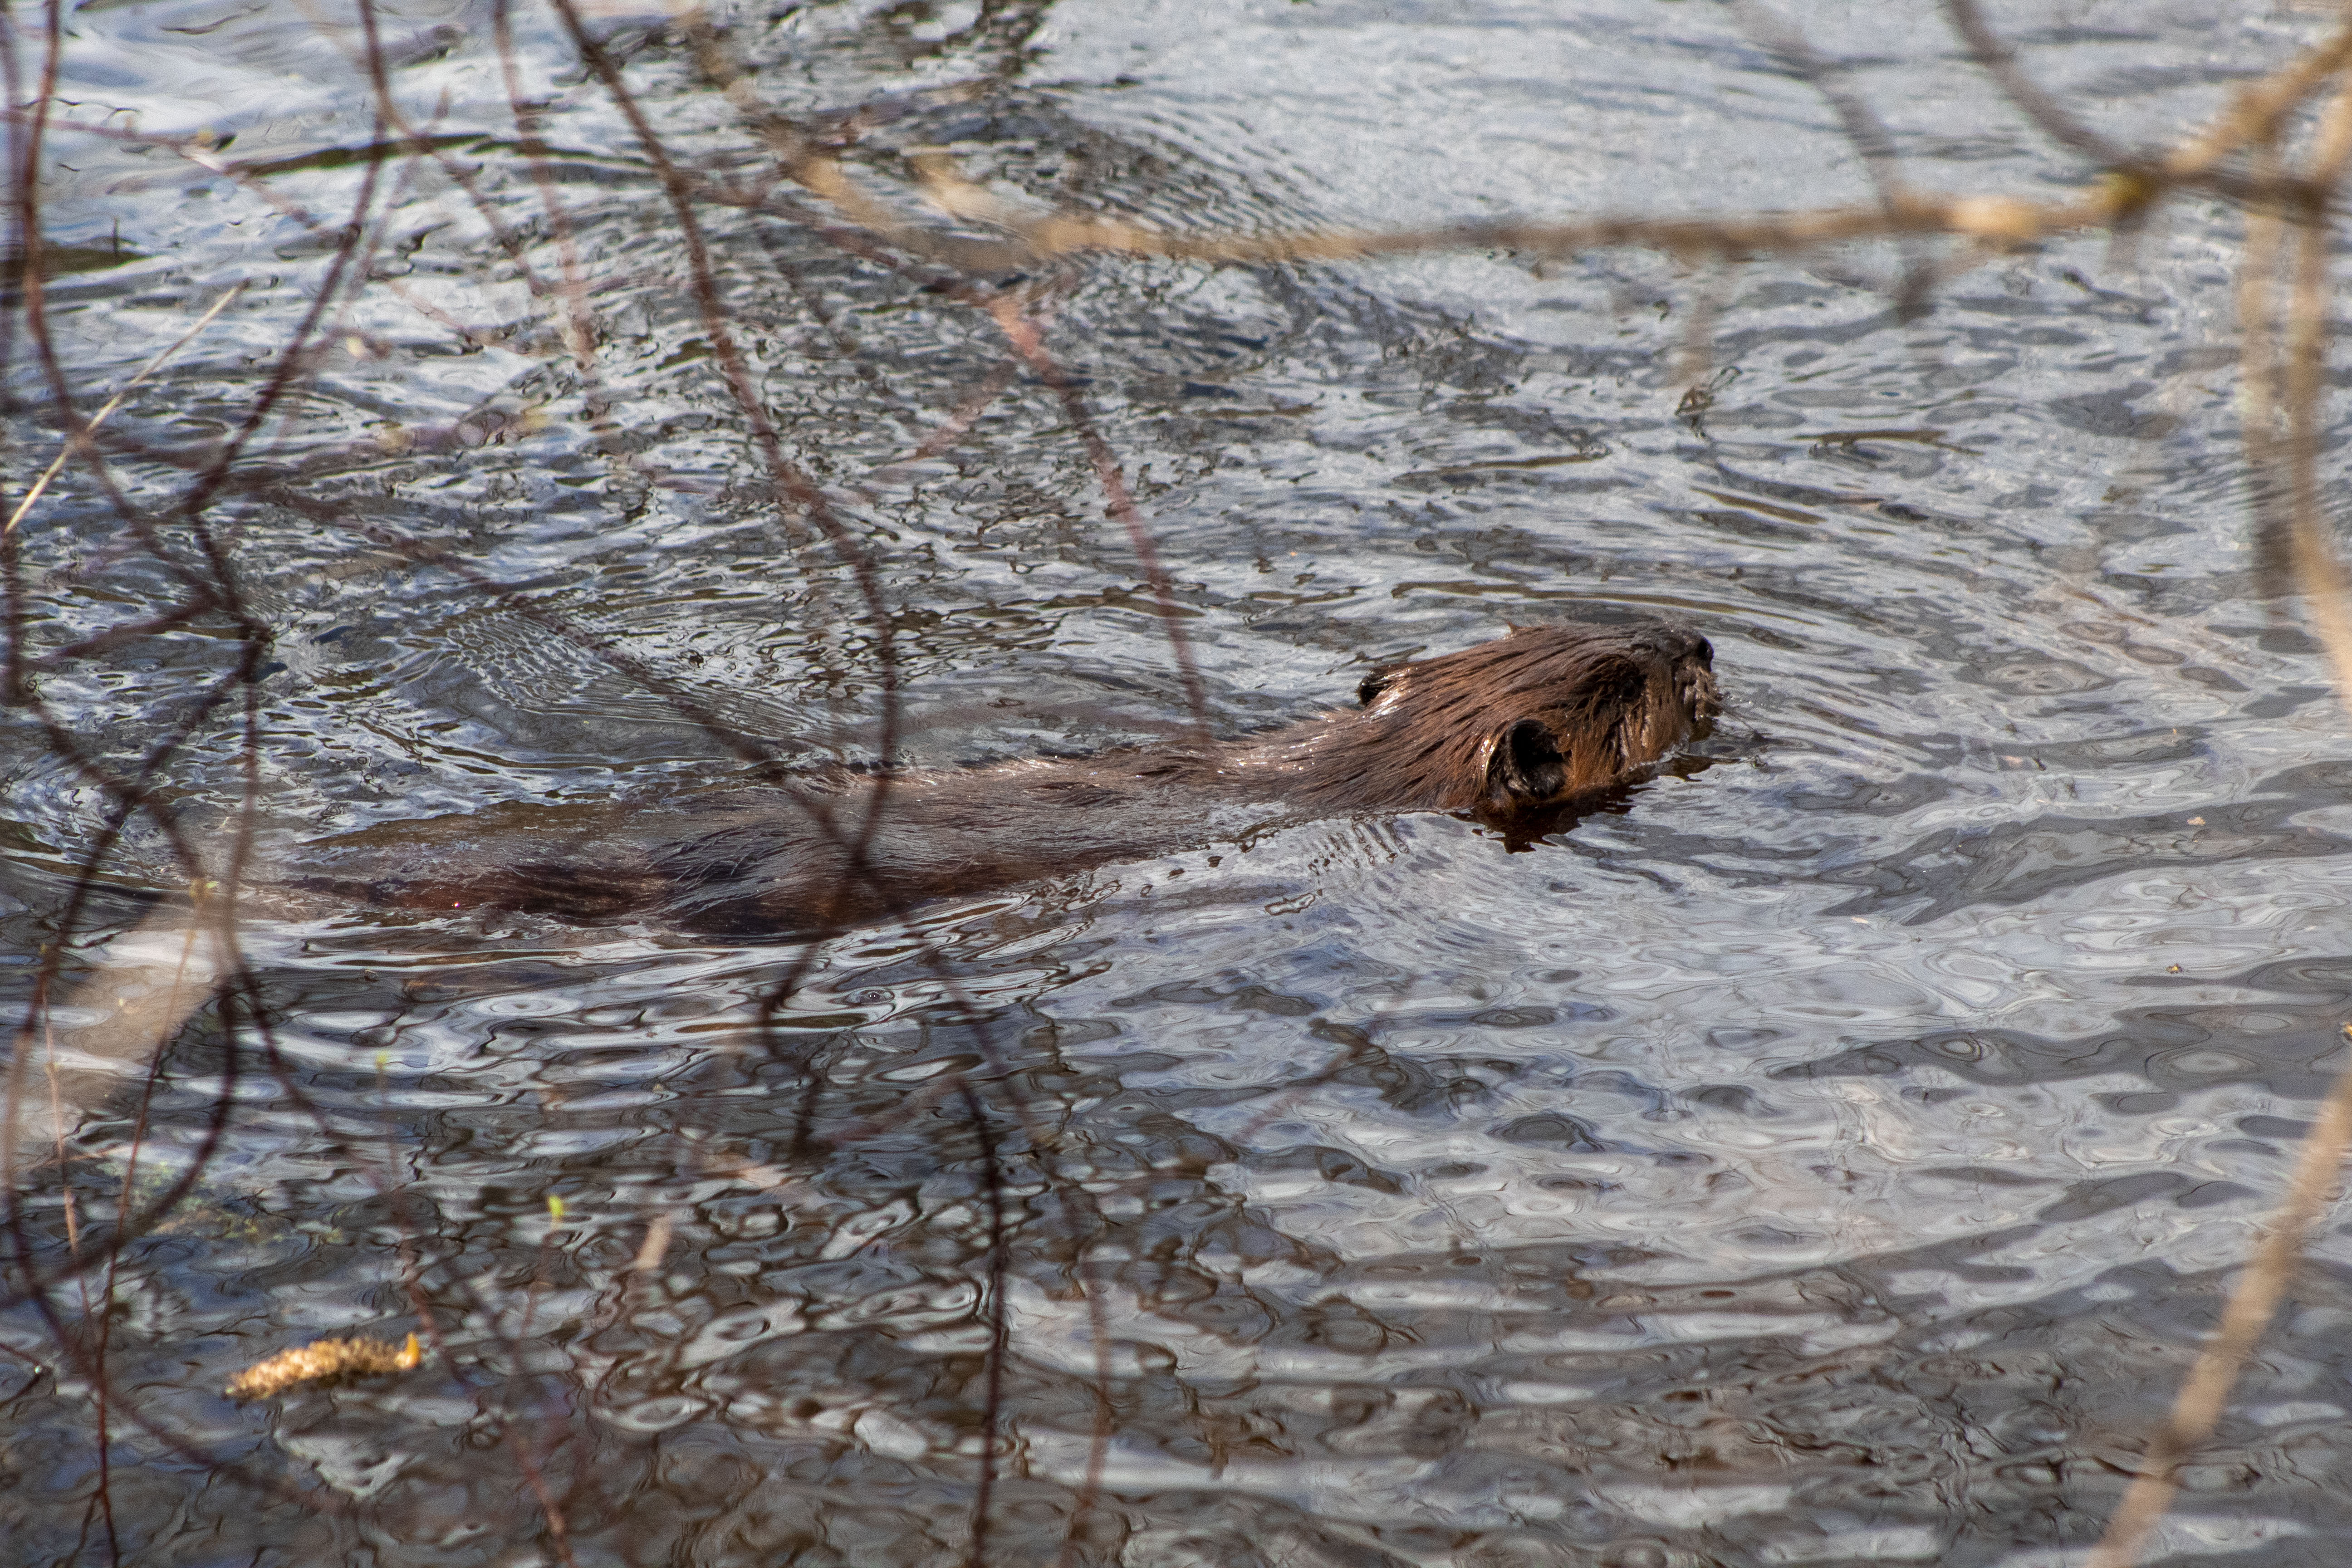
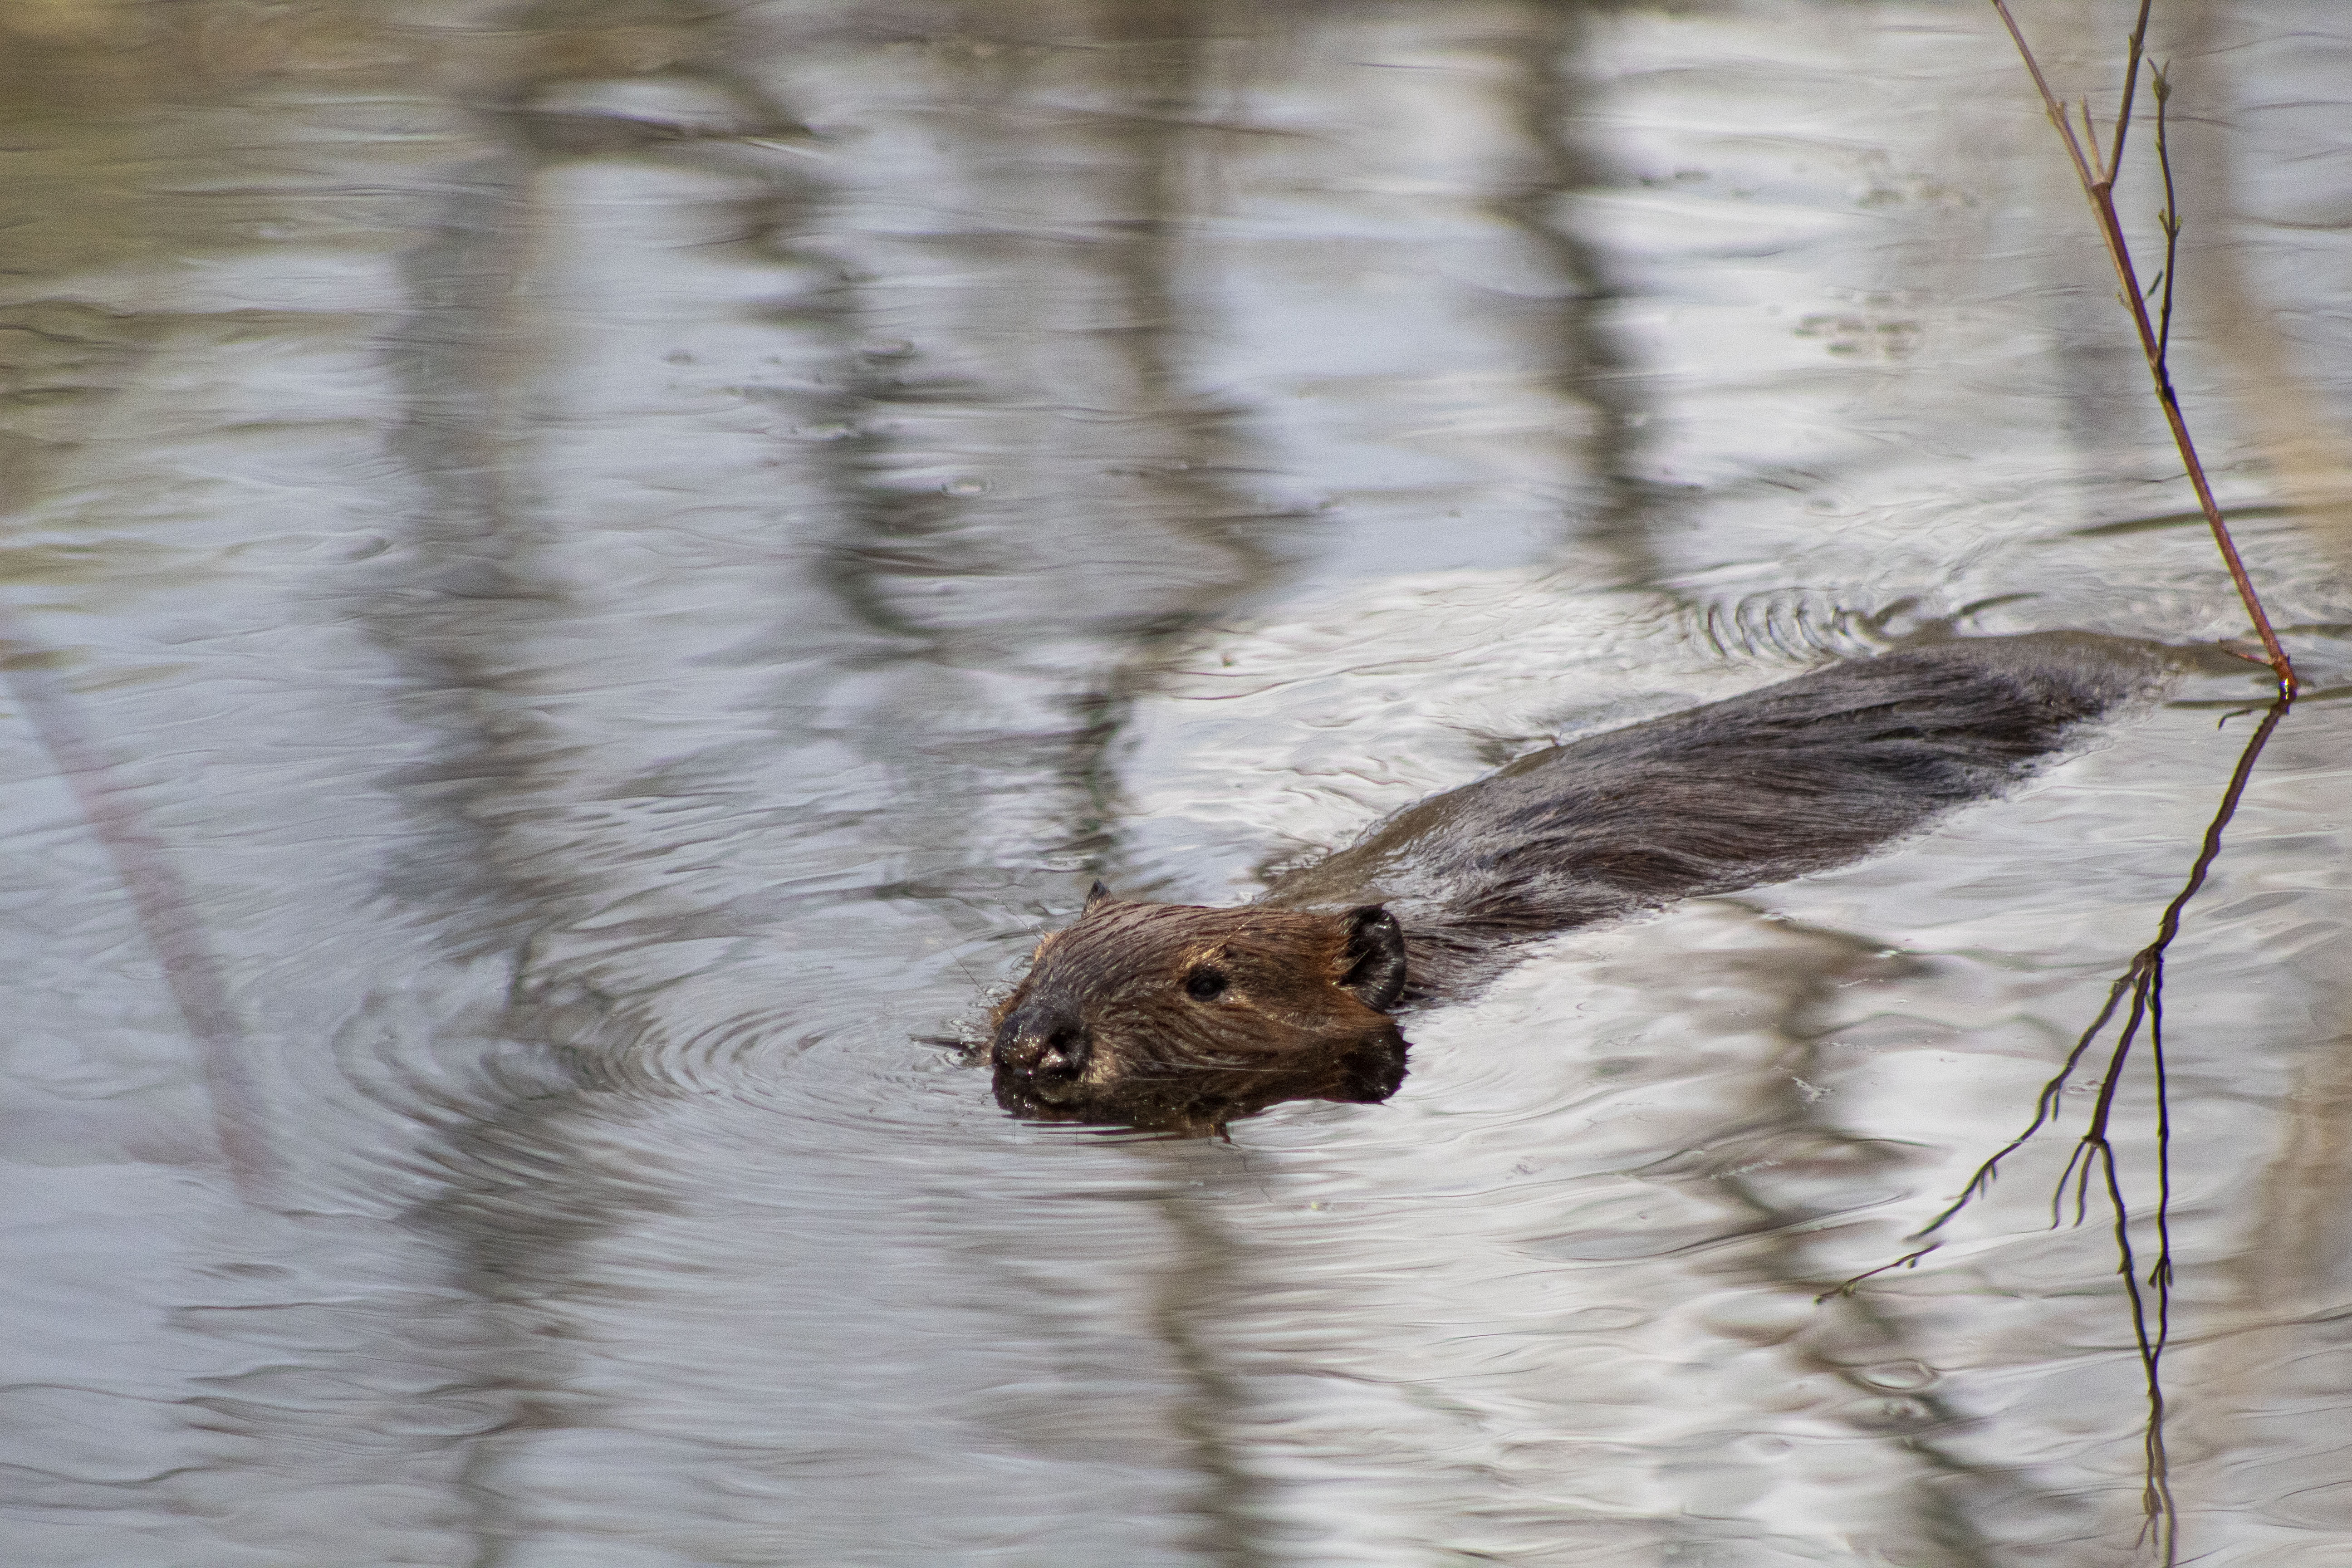
A surprise guest came to the pond while I was sitting there with the turtles; a beaver came to the pond! He swam around until he hid in a bush where I unfortunately could not get a clear picture of him.
I definitely look forward to going back to Baltimore Woods to have more photoshoots with the turtles. They were great models to use for practice with the zoom lens and using different apertures. Please enjoy some more photos below.
Also known as stop-motion photography, Photoshop makes it easy to create GIFs with your photographs. Follow below for a step-by-step guide to using the Timeline feature in Photoshop to create your own GIFs.
Creating a GIF
When taking pictures for a GIF, it’s best to use a tripod to keep the images steady. This will help make the transitions appear seamless. By setting your camera to continuous shooting, you can capture the movements within a set amount of time. RAW images will be better overall, but jpegs can also be used.
Open all images you want to use in Photoshop
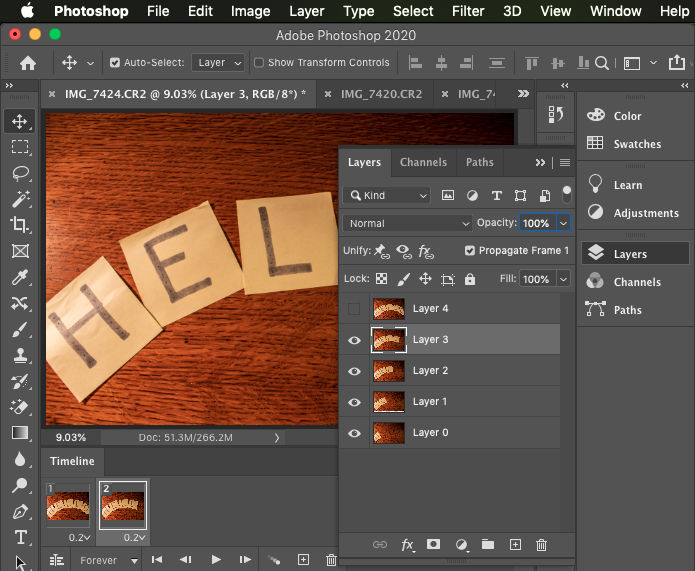
2. Using the Layers tab, stack the images into a new layer for each photo. I usually drag the image from my other tabs and drop into one tab. *Make sure your first layer is unlocked, and not a Background layer. (Layer 0)
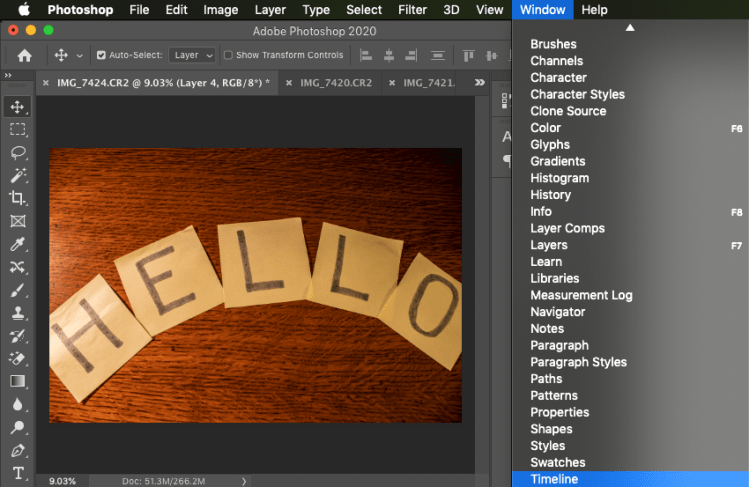
3. Go to Window > then select Timeline. A ribbon will appear beneath your photo.
4. Select Create Frame Animation.
5. In the Timeline ribbon, select the box with the plus sign ‘Duplicates selected frame’.
6. After you duplicate the slide, hide the top-most layer. Repeat this process for every new frame created until you get to your last layer. *If you’d like to start with your first layer, hide all layers first and then unhide them when each new frame is created.
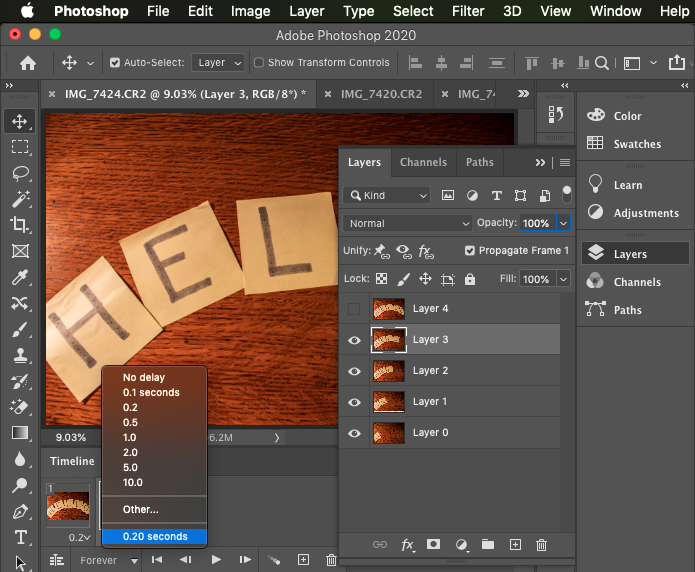
7. Once all your frames are created, select the drop-down arrow next to the seconds to change the amount of time each frame will be active. The default time is 0 seconds.
* For my Hello GIF, I made each frame 0.2 seconds, then made the last frame with the ‘O’ 0.5 seconds to create a little lapse before it goes back to the ‘H’.
8. After changing the time, press the play button to preview your GIF.
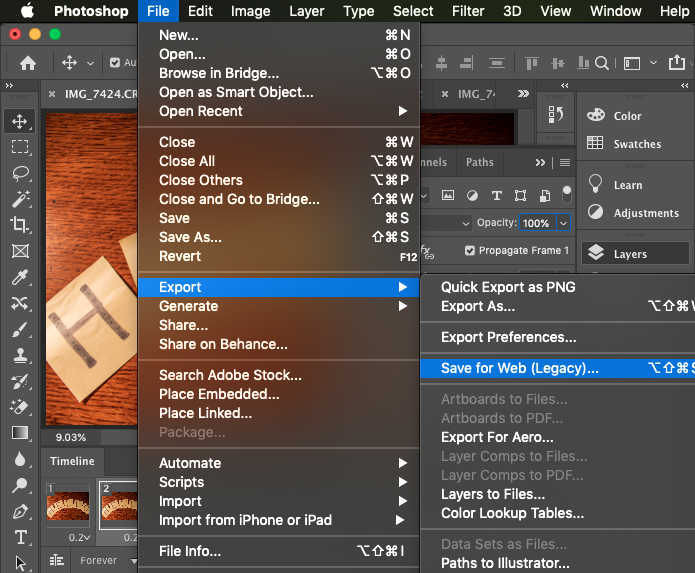
9. Once you have the outcome you wish, you can export your GIF by selecting:
File > Export > Save for Web
10. In the exporting dialogue box, make sure your settings are:
GIF, not JPEG
Colors are set at 256 for maximum amount of quality
Convert to sRGB is selected for better quality online
Looping Options is set at Forever
11. Your image size presets will be too large and create a poor-quality GIF. I like to keep my settings at a minimum of 600px for width and 400px for the height. You may want to experiment these numbers to get your best outcome.
12. Then it’s time to share! You’ve created a GIF with photographs!
This GIF was created with two frames, each at 0.2 seconds
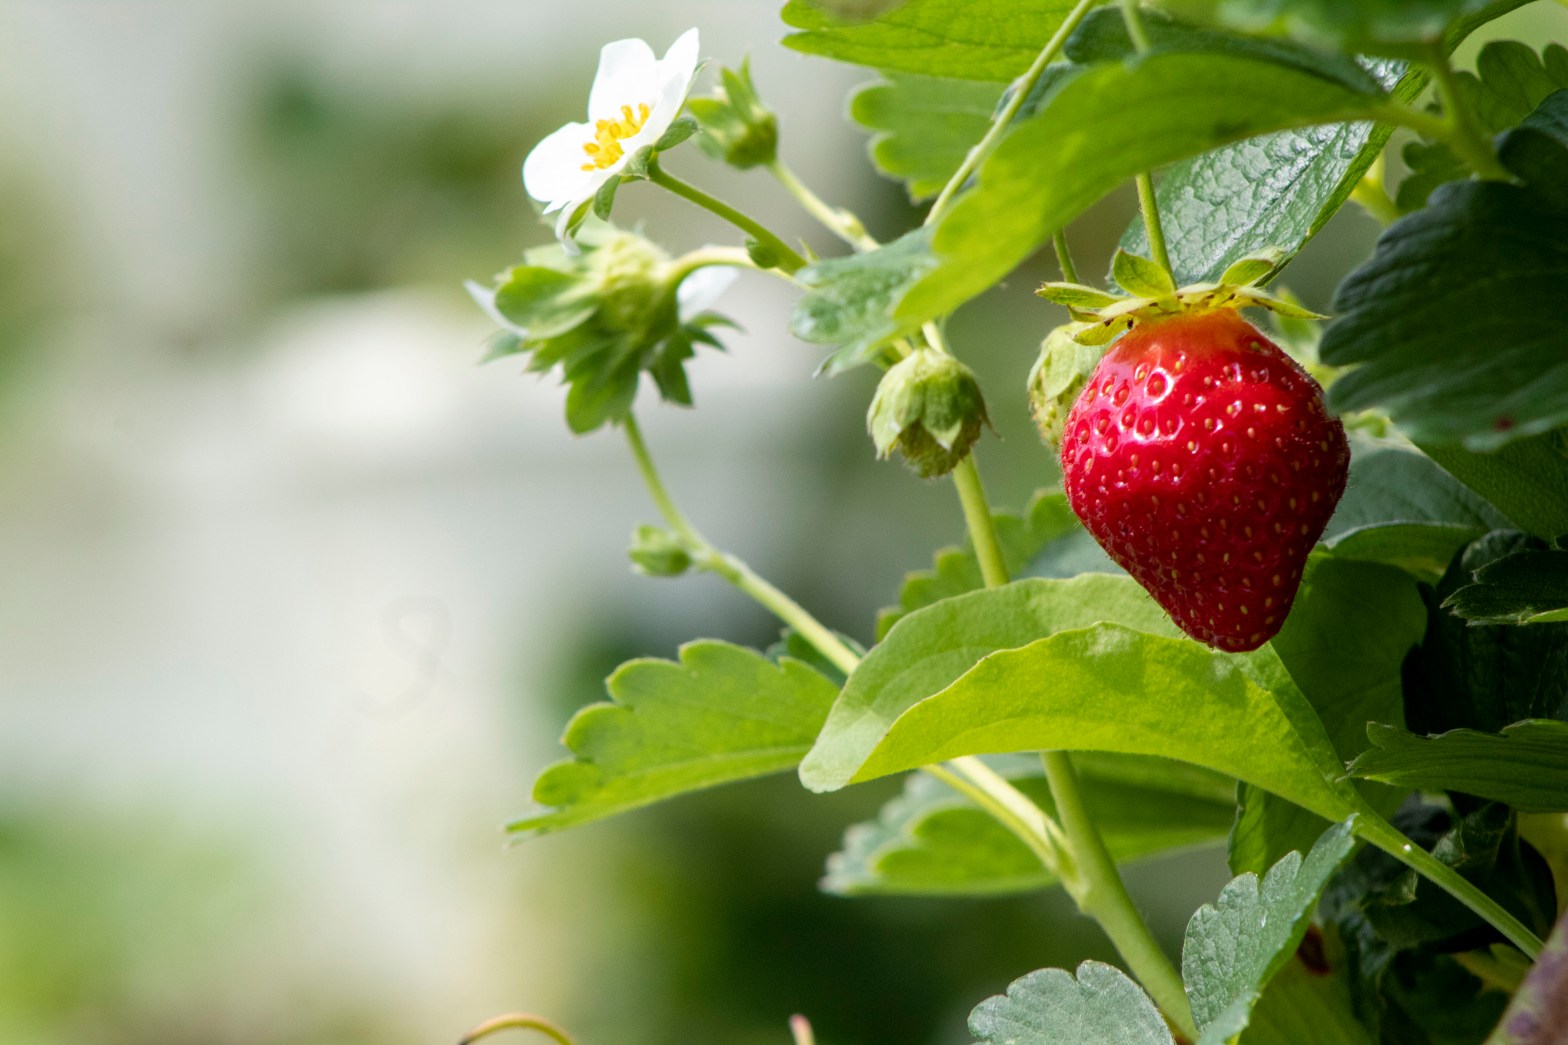
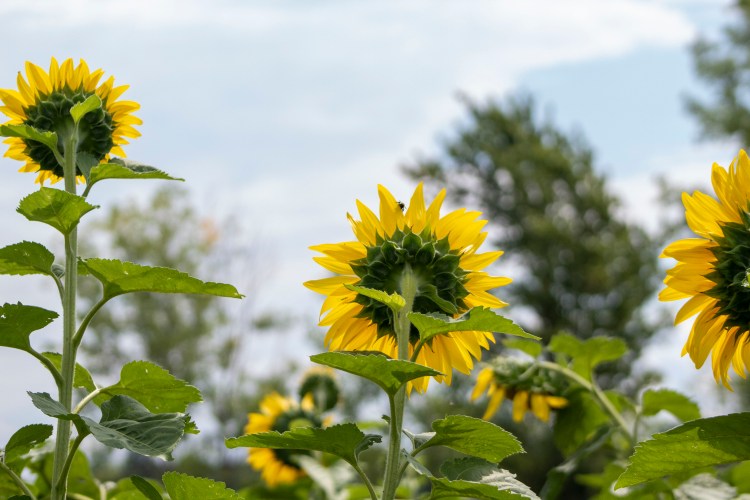
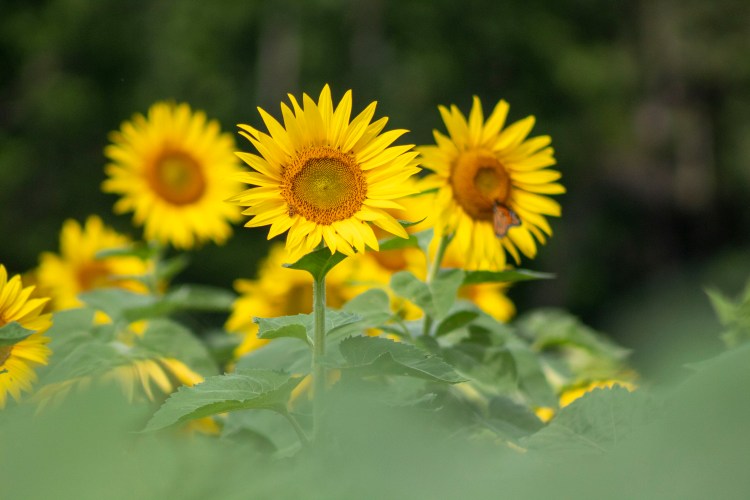
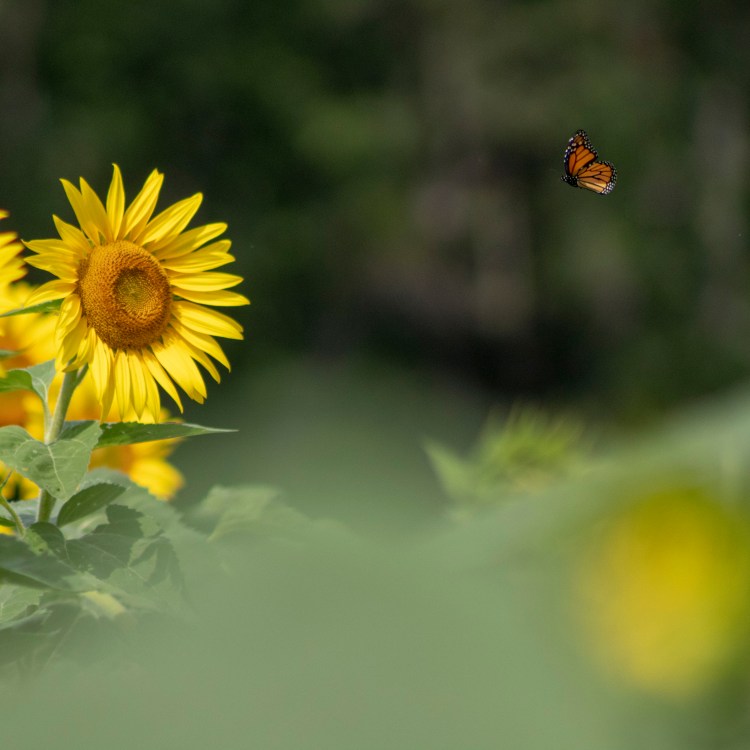
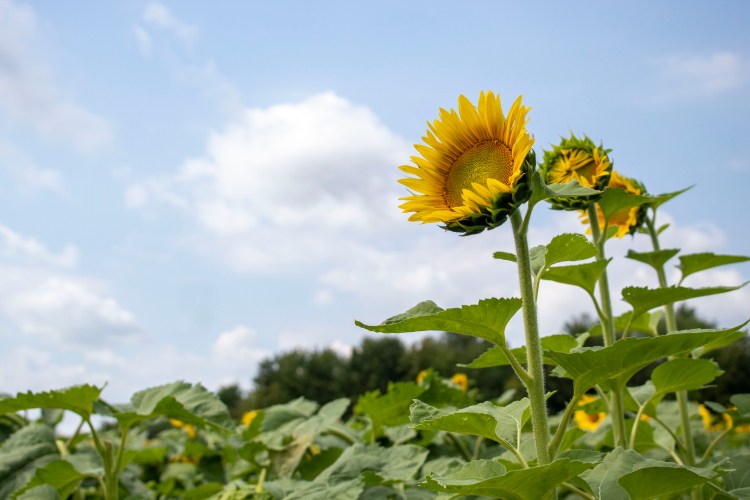
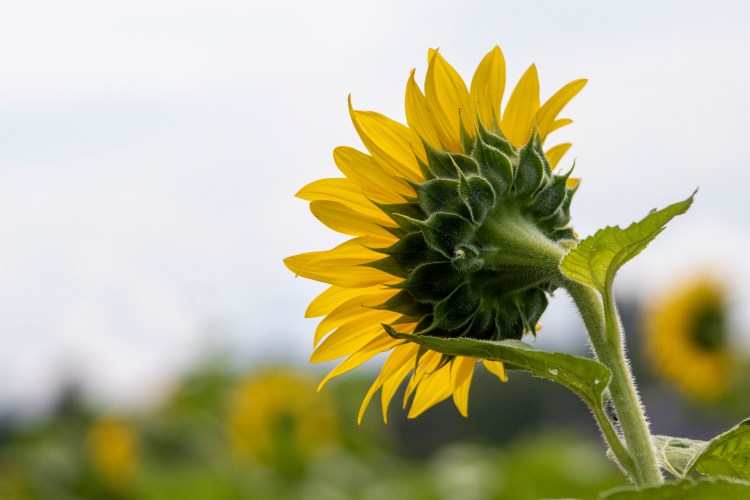
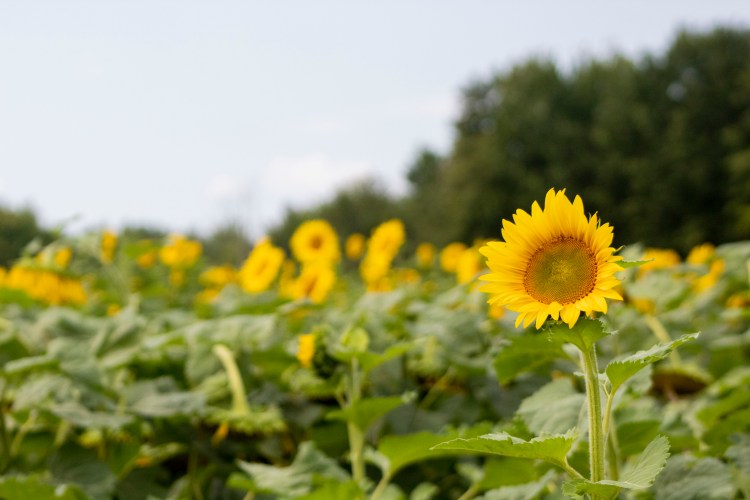
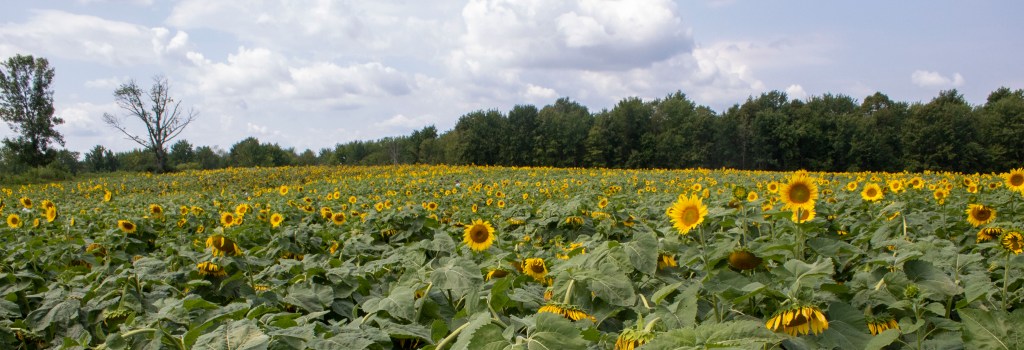
Can’t end the summer without jumping on the trend of taking sunflower field pictures. Near Skaneateles, New York, the Strawberry Fields Hydroponic Farm has a sunflower maze and pick-your-own strawberries. Here are ten of my favorite photos from our afternoon spent there!
Black and white photography achieves a timeless, moody feeling to a picture with just the absence of color. Using the fundamentals of photography, you can create these striking photos, but there are additional techniques outlined in the steps below that can be used to create greater effects.
Using the Basics
Without color, black and white photography rivets a viewer’s focus on to the main subject, the textures or patterns, and the composition of the photo. So it’s all the more important to use the fundamentals of photography, like the rule of thirds, that you’d still use in color photography.
When looking for black and white photography, it’s best to look for contrast, the difference between light and dark tones. As a photographer, you should be looking for differences in light, lines, and patterns, but this is especially important for black and white photography.
Shoot in Color, Switch to Black and White
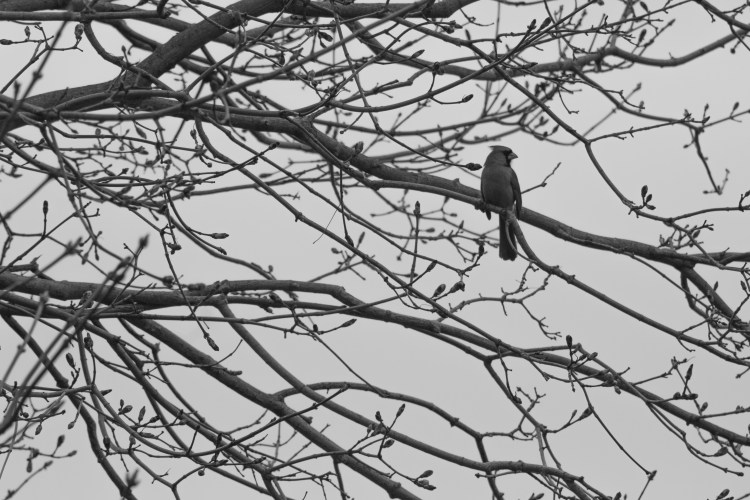
My favorite way to do black and white photography is to first shoot in color, then later edit the photo to black and white. This can easily be done if you shoot in RAW mode, and can be with the click of the ‘Black and White’ button in Photoshop Camera RAW. By shooting in color first, you have the option to use both the color and the black and white, because they may be striking in both formats.
This photo works with color because of the red pop from the cardinal
The black and white is still interesting because of the texture and contrast of the branches
Editing Your Images
Yes, most editing softwares have a button to convert color images to black and white, but you’re not done there. Even if you shoot in black and white, there are a few editing tips you can do to increase your photo’s look.
Increase the contrast, reduce the brightness
Increase the contrast, reduce the shadows
Add some grain to achieve a ‘film look’
Change specific color’s saturation
Increase the whites and shadows for a harsher effect
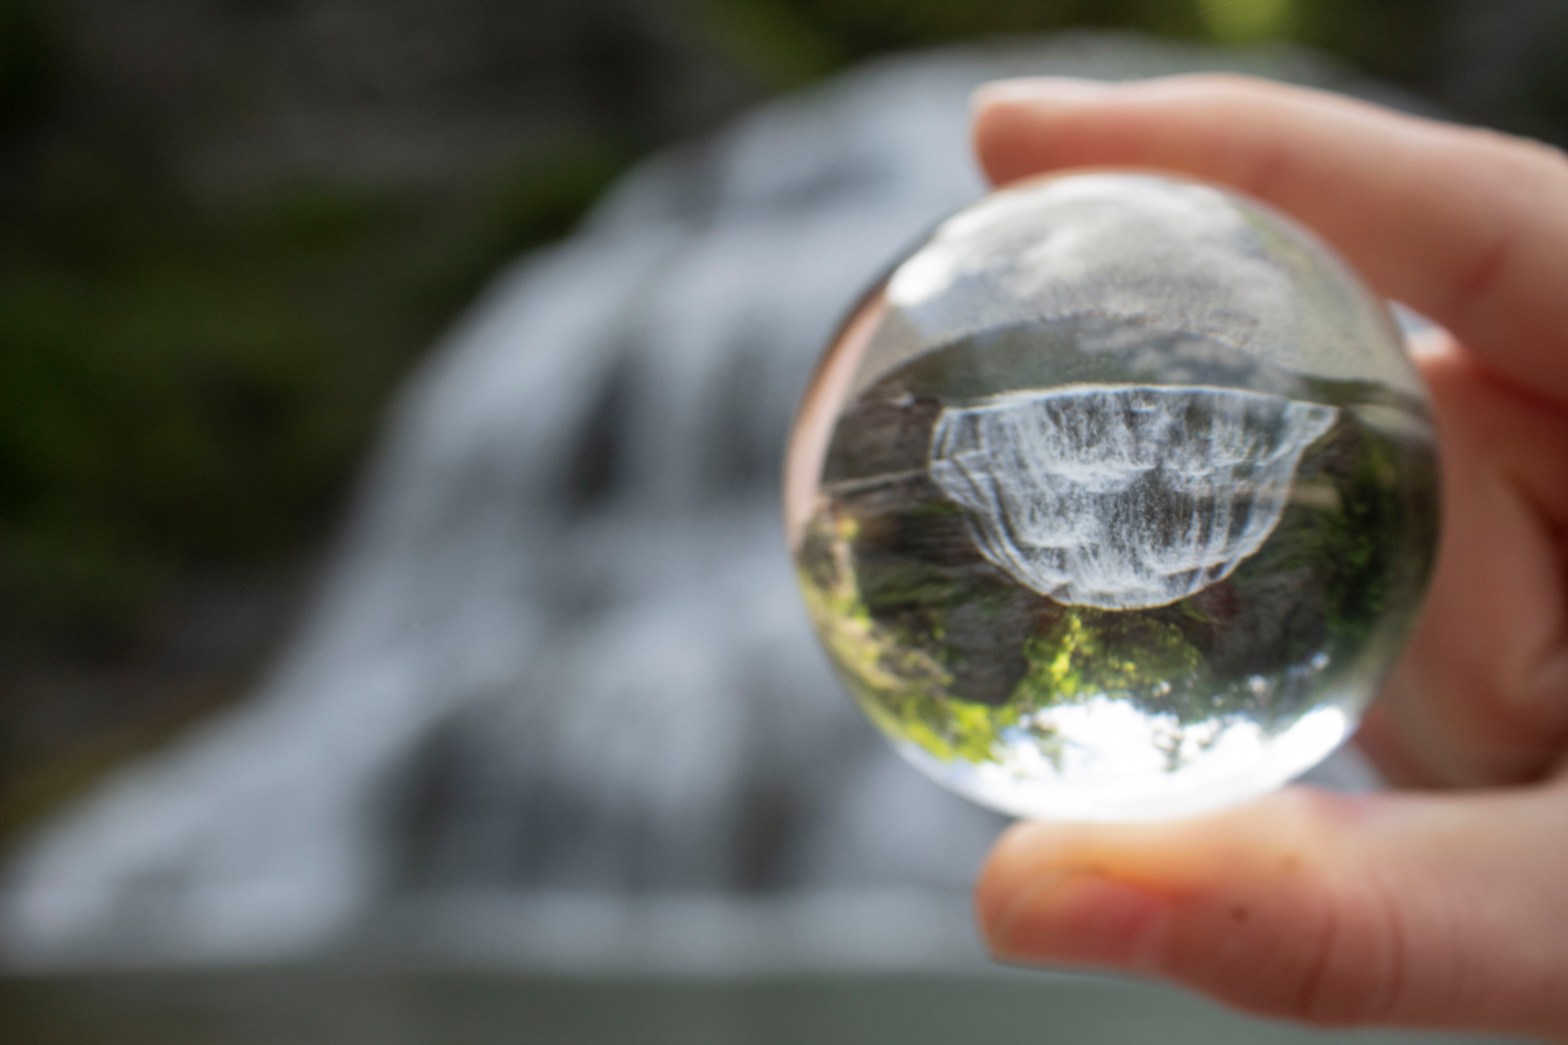
A lensball creates a cool photo effect by capturing a moment of time inside a small crystal ball. The lensball comes in a variety of sizes ranging from 60mm to 120mm. Currently I have an 80mm lensball which is a great size for traveling.
The inverted image is caught by light being bent while passing through the crystal (called refraction). And the sphere-shape of the crystal creates a fish-eye effect on the subject.
Some subjects that work great with lensball photography are water, landscapes, people, nature, architecture, and reflections. To create more dramatic looks, try out different angles, put it on the ground, shoot from below the lensball, or you can find cool Photoshop tutorials online.
Camera Settings:
Experiment with Aperture- I like having a blurry background to keep the focus on the subject in the lensball (f/stop is usually around f/5 or f/4). However, a high aperture is good with landscapes when the background and the glass ball are both in focus.
Keep your ISO low- If permitted, a lower ISO will help reduce grainy images.
Shutter Speed Varies- Depending on time of day and if you’re holding the lensball or if it is on a stand, shutter speed should be at a speed to allow the most light in.
Manual Focus- With manual focus, it is easier to control where the focus will be in your shot. Make sure the focus is on the subject within the ball for clear photos.
Manual focus was not used in this picture, so the subject came out blurry
With manual focus, the subjects come out sharper and you have creative liberty over what is in focus or not.
Composition:
Keep the Balance- A flat surface or one with grooves to place the lensball are best for taking lensball photos. Stands are also recommended, or someone can hold the lensball.
Lighting is Key- To reduce other reflections on the lensball, the subject must be well lit. You can use the weather app to see the time of sunset to shoot during Golden Hour. ***- The lensball is a magnifying glass, so it can burn things with direct sunlight. Be aware that grass and other items can ignite and start a fire.-***
Being A Hand Model– positioning the lensball can be difficult without a flat surface, so I like to use my hands. Experiment different ways of holding the lensball to see which best fits your image. Having a volunteer to hold it is the best choice, though, so you can move your camera wherever it needs to go.
It never hurts to turn your camera upside down to see what the lensball photo will look like once inverted
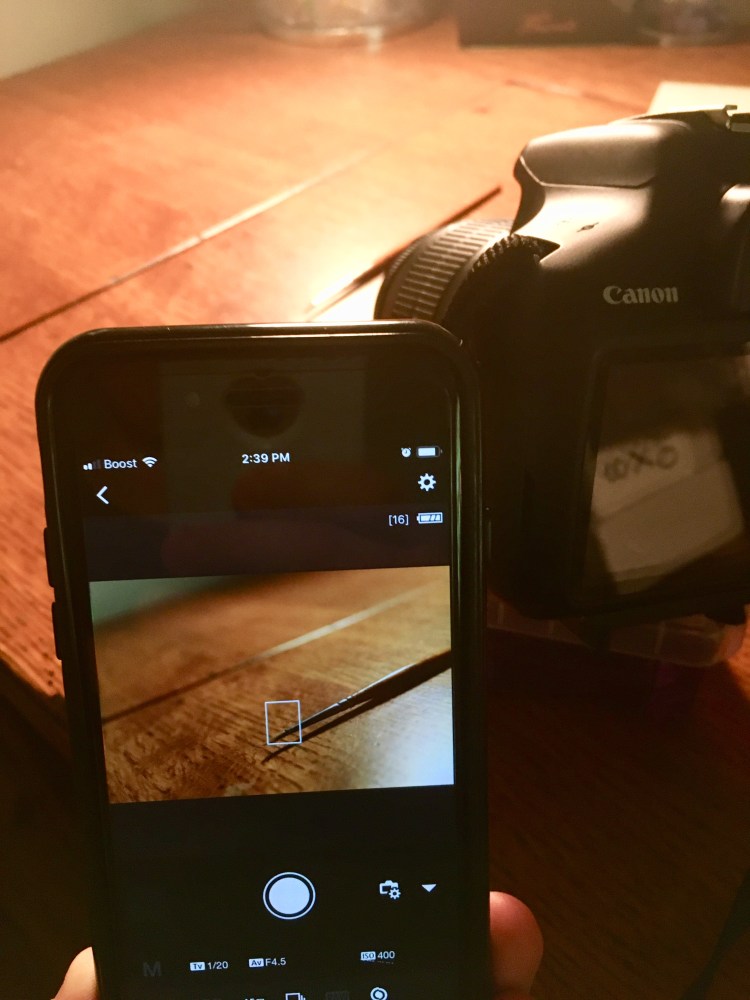
The Canon Camera Connect is a mobile app that allows you to remotely control your camera from your phone. In remote live view shooting mode, the LCD display on the camera shuts off, and a live view from the camera appears on your phone. It’s a nifty trick if you want to explore more in photography.
Using remote live view shooting mode with smartphone
Appearance of app
With the camera’s built-in Wi-Fi function, you are able to control the ISO, aperture, shutter speed, exposure compensation, focus, and shutter button all from your phone. Downloading pictures from your camera to your phone is also accessible. If shooting in RAW mode, the app will automatically compress the image into a .jpeg once downloaded to your Photo Library.
Using remote live view shooting mode, I was able to blow the seeds on the dandelion while taking pictures
The remote live-shoot feature is especially convenient when your tripod is set up precariously and you don’t want to jostle the camera when pressing the shutter button. It can also be used to get close to an animal (like a bird) when you don’t want to disrupt its area for long. In my case, I was able to use it for an easy self-portrait session.
Watching my phone, I was able to adjust my position accordingly
By selecting ‘Images on camera’, the other mode on the app, you can view thumbnails of stored photos on your camera. You can then set a photo as your favorite, save it to your phone, or even delete it on the app. Along the bottom, you can also see different organization properties for sorting or filtering through your photos.
After downloading the Canon Camera Connect App, click Menu on your camera. Go to your configuration settings tabs (the one with yellow wrenches on them) and find the Wi-Fi/NFC. If it is set at Disable, change it to Enable. Then, select Wi-Fi function and select the phone icon, ‘Connect to smartphone’. Choose the set. you want to connect to (directions for this can be found on the app with the ‘Easy Connection Guide’ button) and then your camera will connect to your smartphone.
Unfortunately, there are some shortcomings when it comes to the app. The remote video shooting and time lapses are not available on the app’s features yet. I also have not been able to figure out how to adjust to portrait mode on the app.
HDR stands for “High Dynamic Range” imaging. Referring to the level of light in a photo, HDR photos have very deep shadows and highlights.
You may have seen this term while taking pictures on your phone. Like some higher-tech cameras and phones, HDR photos can be taken and processed on the device. For other photographers, HDR photos are needed to be manually merged.
Fusing together three photos of the same scene set at different exposure levels, HDR photography creates a photo that has all the dynamic ranges of light.
Shooting in HDR
Depending on your camera, there are many different options and shortcuts to getting into HDR mode. For my Rebel T6 Canon in manual mode, I can access my exposure levels by hitting the ‘Q’ button and the ‘Exposure comp. /AEB settings’ will become highlighted. By using the dial, two more ticks will appear moving in opposite directions. This is called “bracketing”, and many cameras have this built-in bracketing tool.
When shooting an image, the camera will take three photos. The first photo will be the mid-range exposure, then the highlights, and the final one being the shadows. If shooting on a timer, the camera will automatically take three photos. Many photographers also take up to five or seven exposures instead of three. As long as your exposures are at equally opposite stops from each other, then you’ll be able to process the photos to create an HDR. (-1, 0, +1) or (-2, 0, +2)
0 mid-range exposure
-1 exposure – shadows
+1 exposure – highlights
*To distinguish between each set, I like to take a picture of my feet or hands. This way, I won’t accidentally delete one of the under or over-exposed images.
HDR Processing – Photoshop
Opening the HDR RAW files in Photoshop Camera Raw, select the files and then click on the three dots for more options. Towards the bottom of the drop-down menu, Merge to HDR will appear. Photoshop will bring up a preview of the merged HDR once loaded.
For more advanced adjustments, opening the files in Photoshop and going to File > Automate > Merge to HDR Pro will allow you to edit the HDR photo with curves, color, and different filter presets.
When shooting, using a tripod is best, as ‘ghosts’ might appear during processing from movement. Avoid this by shooting subjects that are not fast-moving or altering the photo during processing. On Photoshop and Lightroom, deghosting features are an option, as seen in the two pictures below.
Before removing ghosts
After removing ghosts
Subjects for HDR
As mentioned above, moving subjects can be hard to capture for an HDR photo. It is best to pick scenes void of movement. Use a tripod!
Pick scenes with high differences in light. As HDR means high dynamic range, places with drastic changes in light will benefit the most from creating an HDR image.
Nature scenes with mountains, greenery, and plenty of sky are my favorites for HDR images. The colors of a sunset or sunrise can really benefit from combining the different exposure levels.
The mood of a photo is the feeling you get when you look at it. It can make you feel happy, gloomy, romantic, or even angry. A photo can evoke these different feelings in different people, but usually a striking photo is not accidental. You can get the composition and the settings correct, but capturing the mood is harder than it might seem at first. Listed below are four ways to create mood in a photograph to make it more compelling and thought-provoking.
Lighting
For whichever mood you’re trying to achieve, it’s best to consider your outdoor lighting. The golden hour is the hour as the sun rises and before it sets, which creates great shadows and light rays. Overcast days are great for dimmer, diffused light. And then other lighting, like artificial and moonlight, are the best for night photography. Using the on-camera flash is a definite way to make your photo feel more unnatural looking. Maybe that’s your goal, but if it’s not, ditch the flash and adjust your settings to achieve a cozier feeling.
2. Using a wide-aperture
Opening up the camera’s aperture will allow more light to come in without using a flash. Remember that aperture is measured in f/stops, and the lower the number the wider the aperture is to let in more light. Setting your aperture at a lower number will also focus on a certain point and blur the rest. It’s easier for a viewer to feel a part of the photo when it’s free of clutter and they can fill in the blanks themselves.
3. Emotions
Emotion is very powerful in images, and this is especially so when it feels more candid rather than posed. Most people can tell the difference between a person who is fake-laughing in an image and someone who is actually laughing. Raw emotion is a sure way to bring out the happiness or drama in a scene. This can be found when others are interacting with one another. These might be just fleeting moments, so recognizing them and then capturing it can be difficult but rewarding.
4. Color
Post-processing the color in images might make the mood of a photo change. Depending on the mood you want, changing the temperature of the colors in a picture can help you achieve this. Shooting in RAW mode will be easier to change the colors without losing the quality of the picture. By changing the color, people will be able to tell the difference between a cool morning or a warm summer day. You can also experiment with converting your colored image to black and white. Black and white photography creates a sense of nostalgia and dramatic flair.
Before diving right into manual settings, a beginner photographer might want to try out their camera’s priority modes. Aperture and Shutter priority modes allow the photographer to focus on changing only one setting while the others remain automatic. It’s a perfect blend of automatic and creative control allowing one to ease into better understanding the exposure triangle, as explained in an earlier post.
Below I will explain what each mode does and when best to use it:
Aperture Priority
Aperture Priority, seen as Av or A on most cameras, gives you control over the aperture while the camera decides which shutter speed and ISO settings are best fit for the conditions.
Aperture controls the depth of field (DOF) of an image, and will either make the background in-focus or blurry based on your settings. A large aperture, (smaller f/stop, like f/5 seen in the picture to the right), will make the background out-of-focus.
Aperture Priority is great for beginners as it’s difficult for an image to be shot too overexposed or underexposed. I used this mode a lot during my time in New Zealand, and encourage new photographers to shoot in this mode when starting out.
Note: Aperture Priority will automatically change the shutter speed to be faster or slower. When the shutter speed gets too slow, (1/60 or below) hand-holding the camera will make the image blurry and a tripod will be needed.
Shutter Priority
Shutter Priority, seen as Tv or S on most cameras, gives you control over the shutter speed to freeze or blur the action of your subject.
Shutter Speed controls how the camera will develop movement in your image. With a fast shutter speed, (like 1/2000) subjects will be frozen and not be blurred. A slower shutter speed will cause the subject’s motions to blur, which could illustrate movement within an image.
Shutter Priority is best used when there’s a lot of movement during the photoshoot. During a sports game, setting a fast shutter speed will allow you to freeze subjects while not having to worry about the other settings. This will make it easier during a fast-paced shoot to not waste time always adjusting all the settings.
Note: Shutter Priority has the camera choose the aperture, so when you have a fast shutter speed to capture a fast-moving subject, the depth of field will be a wide, open aperture.
Beginner and professional photographers alike can use these modes for their photography. As always, the best way to really understand how to use these modes is to go out and practice. Take your camera and switch to either priority mode to test the settings and see how it affects the image’s exposure. Manual settings will become a lot easier once you’ve mastered these modes.
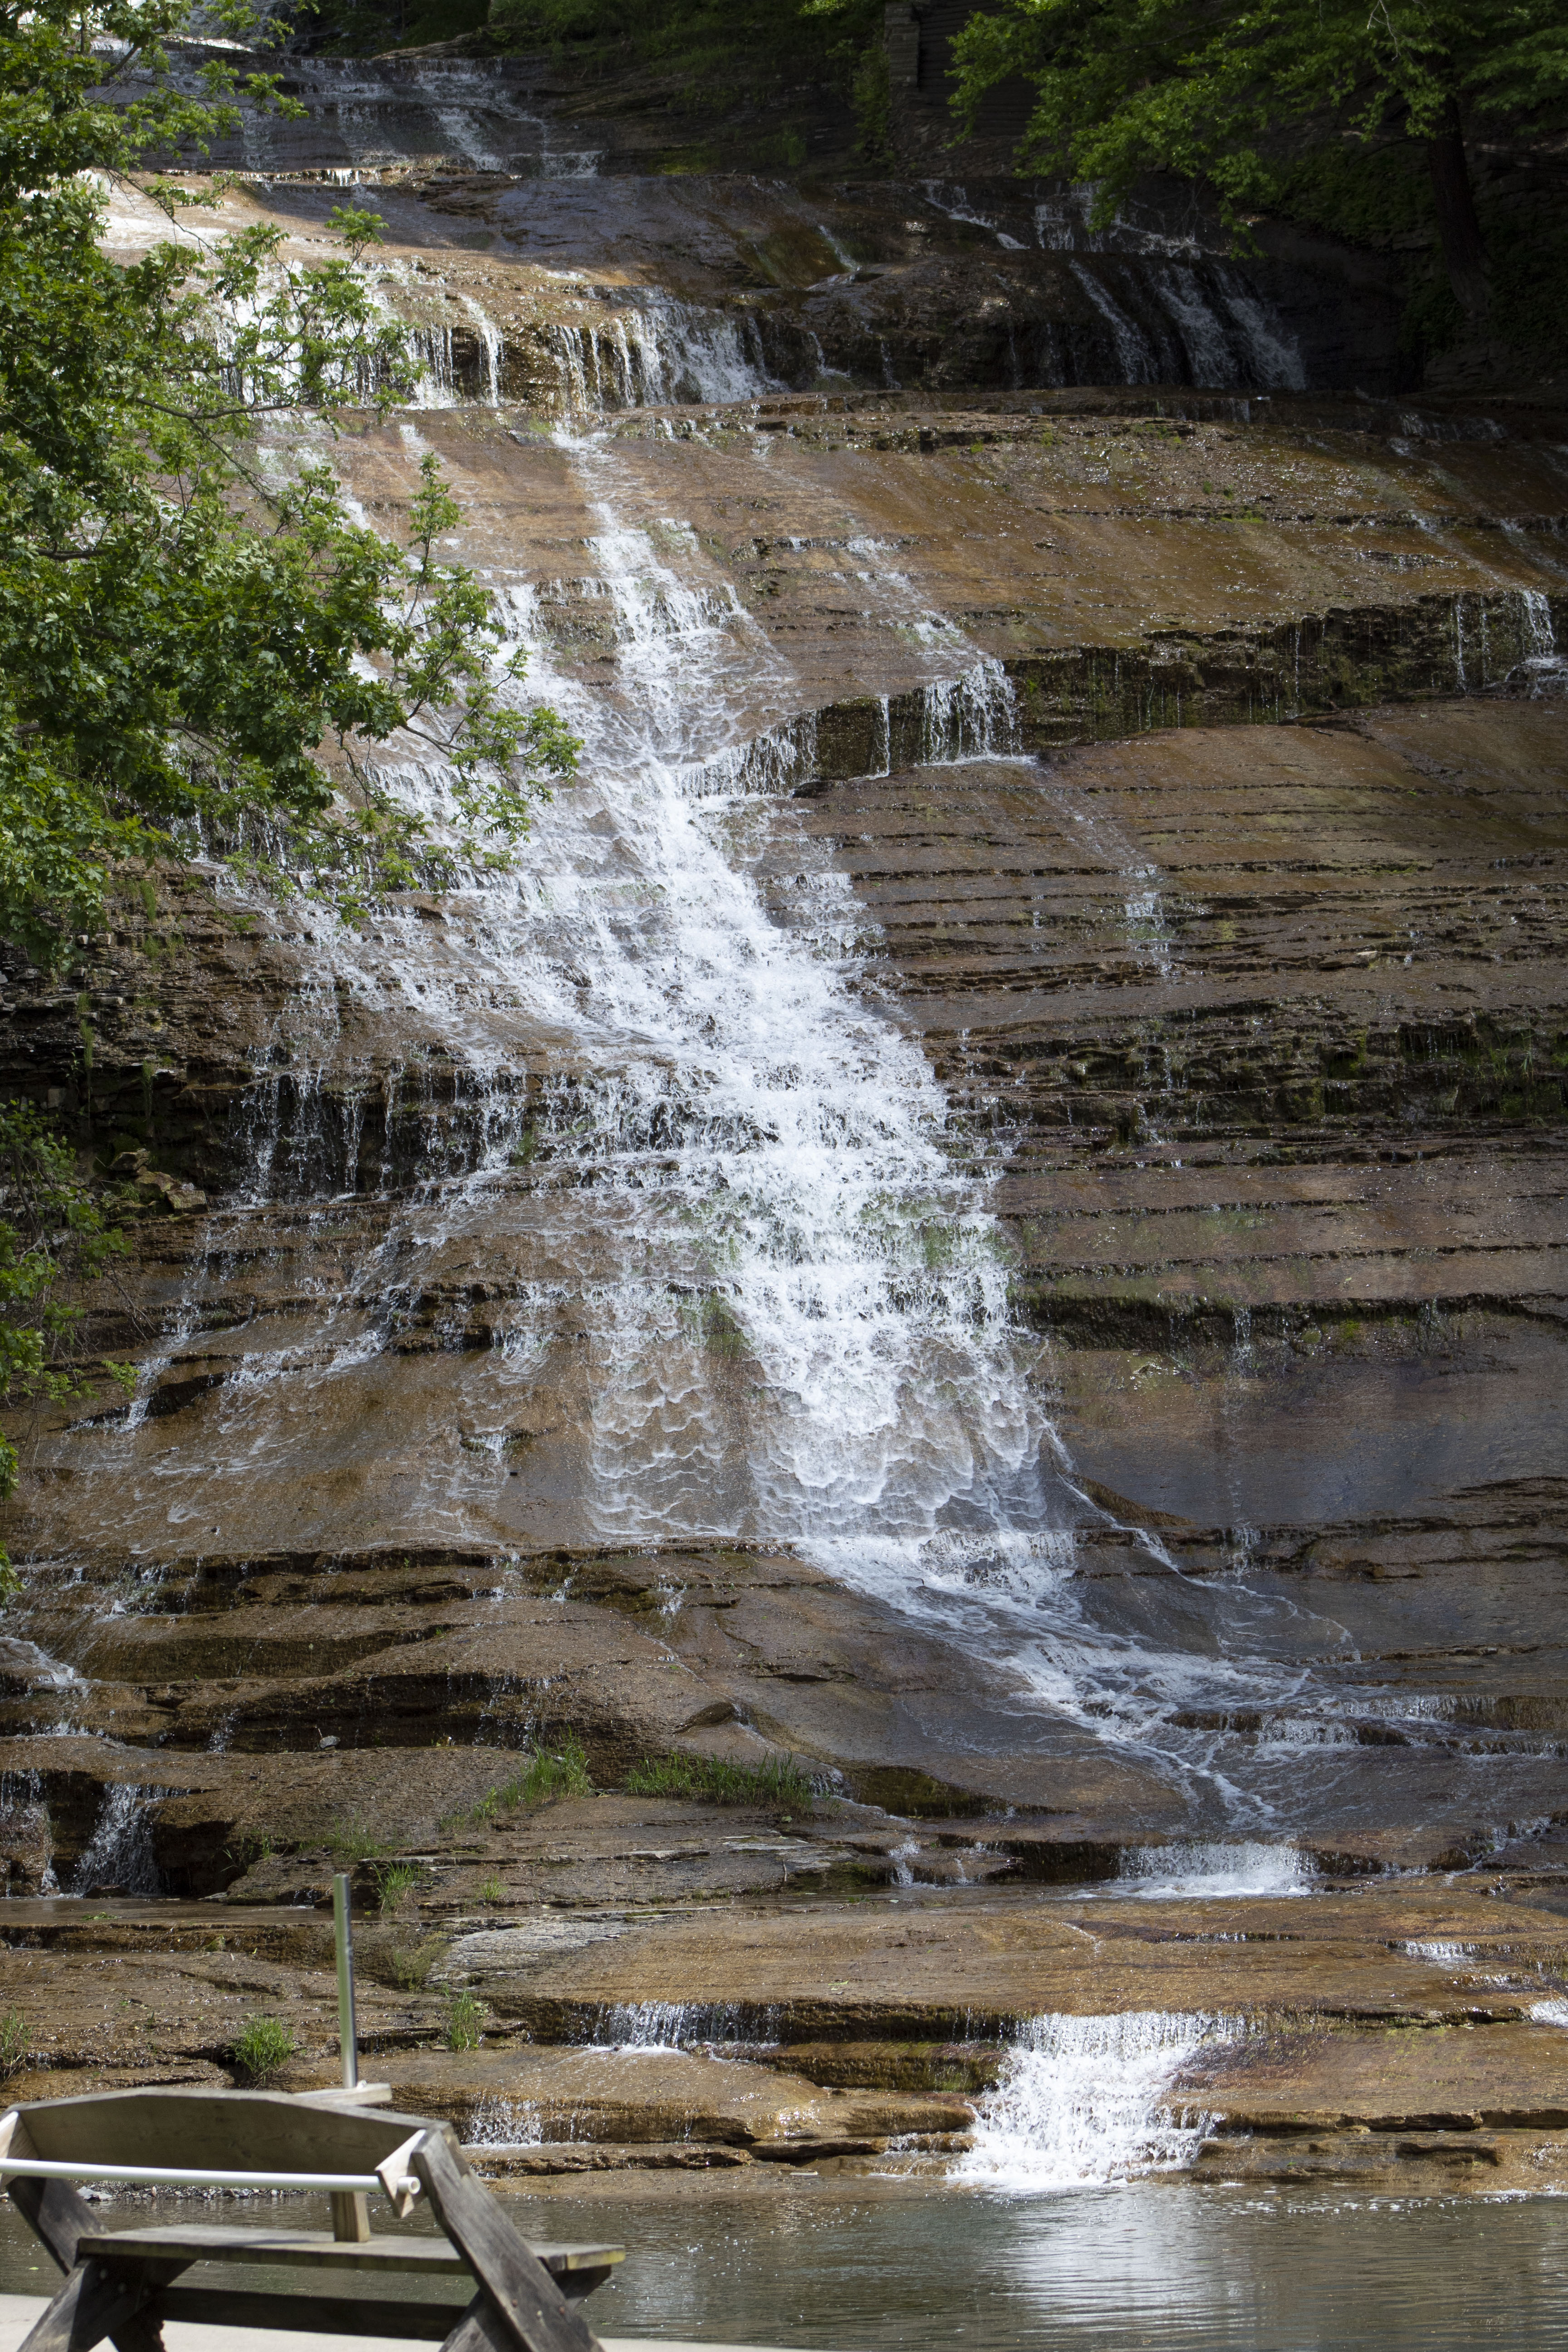
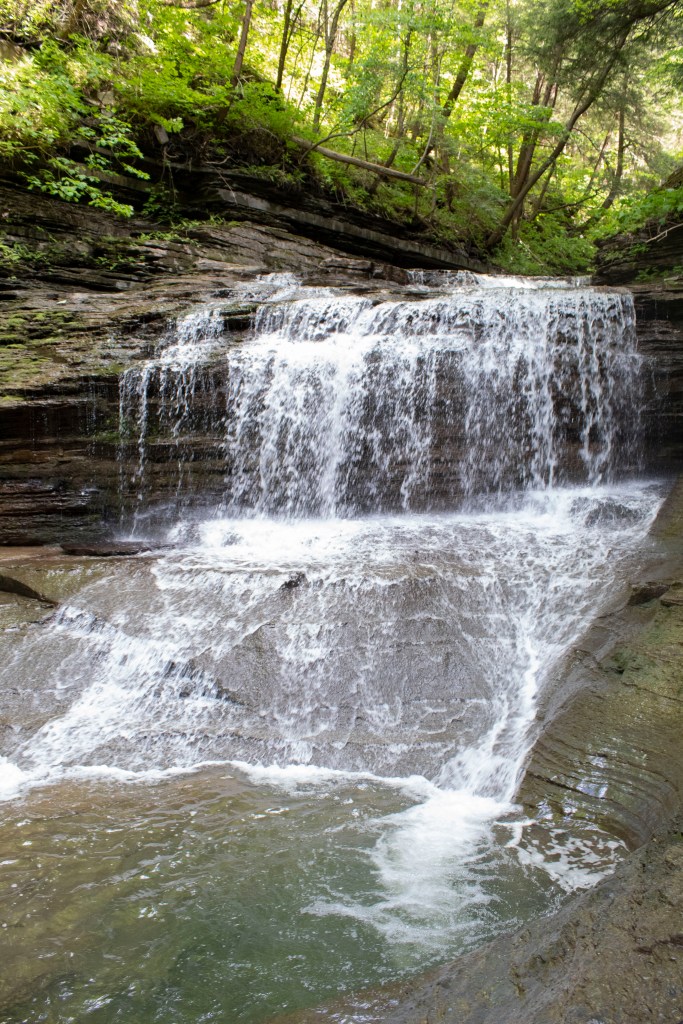
One of my first weekends in New York I decided to spend time at the Robert H. Treman State Park and Buttermilk Falls. Due to Covid-19, we had to keep our masks on, but that didn’t obstruct the beautiful views around us. Below are 10 of my favorite photos I took while we hiked around the parks!